b
Getting started with GitHub Actions
Before we start playing with GitHub Actions, let's have a look at what they are and how do they work.
GitHub Actions work on a basis of workflows. A workflow is a series of jobs that are run when a certain triggering event happens. The jobs that are run then themselves contain instructions for what GitHub Actions should do.
A typical execution of a workflow looks like this:
- Triggering event happens (for example, there is a push to the main branch).
- The workflow with that trigger is executed.
- Cleanup
Basic needs
In general, to have CI operate on a repository, we need a few things:
- A repository (obviously)
- Some definition of what the CI needs to do: This can be in the form of a specific file inside the repository or it can be defined in the CI system
- The CI needs to be aware that the repository (and the configuration file within it) exist
- The CI needs to be able to access the repository
- The CI needs permissions to perform the actions it is supposed to be able to do: For example, if the CI needs to be able to deploy to a production environment, it needs credentials for that environment.
That's the traditional model at least, we'll see in a minute how GitHub Actions short-circuit some of these steps or rather make it such that you don't have to worry about them!
GitHub Actions have a great advantage over self-hosted solutions: the repository is hosted with the CI provider. In other words, GitHub provides both the repository and the CI platform. This means that if we've enabled actions for a repository, GitHub is already aware of the fact that we have workflows defined and what those definitions look like.
Exercise 11.2.
In most exercises of this part, we are building a CI/CD pipeline for a small project found in this example project repository.
11.2 The example project
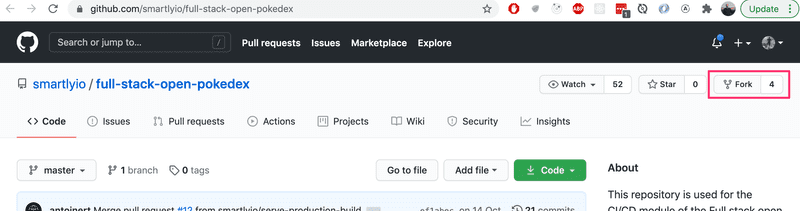
The first thing you'll want to do is to fork the example repository under your name. What it essentially does is it creates a copy of the repository under your GitHub user profile for your use.
To fork the repository, you can click on the Fork button in the top-right area of the repository view next to the Star button:
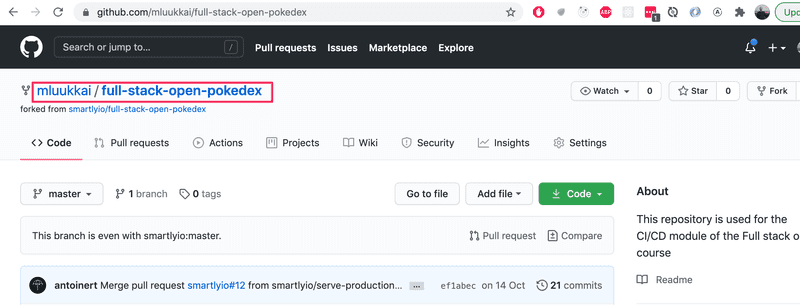
Once you've clicked on the Fork button, GitHub will start the creation of a new repository called {github_username}/full-stack-open-pokedex.
Once the process has been finished, you should be redirected to your brand-new repository:
Clone the project now to your machine. As always, when starting with a new code, the most obvious place to look first is the file package.json
NOTE since the project is already a bit old, you need Node 16 to work with it!
Try now the following:
- install dependencies (by running
npm install) - start the code in development mode
- run tests
- lint the code
You might notice that the project contains some broken tests and linting errors. Just leave them as they are for now. We will get around those later in the exercises.
NOTE the tests of the project have been made with Jest. The course material in part 5 uses Vitest. From the usage point of view, the libraries have barely any difference.
As you might remember from part 3, the React code should not be run in development mode once it is deployed in production. Try now the following
- create a production build of the project
- run the production version locally
Also for these two tasks, there are ready-made npm scripts in the project!
Study the structure of the project for a while. As you notice both the frontend and the backend code are now in the same repository. In earlier parts of the course we had a separate repository for both, but having those in the same repository makes things much simpler when setting up a CI environment.
In contrast to most projects in this course, the frontend code does not use Vite but it has a relatively simple Webpack configuration that takes care of creating the development environment and creating the production bundle.
Getting started with workflows
The core component of creating CI/CD pipelines with GitHub Actions is something called a Workflow. Workflows are process flows that you can set up in your repository to run automated tasks such as building, testing, linting, releasing, and deploying to name a few! The hierarchy of a workflow looks as follows:
Workflow
-
Job
- Step
- Step
-
Job
- Step
Each workflow must specify at least one Job, which contains a set of Steps to perform individual tasks. The jobs will be run in parallel and the steps in each job will be executed sequentially.
Steps can vary from running a custom command to using pre-defined actions, thus the name GitHub Actions. You can create customized actions or use any actions published by the community, which are plenty, but let's get back to that later!
For GitHub to recognize your workflows, they must be specified in .github/workflows folder in your repository. Each Workflow is its own separate file which needs to be configured using the YAML data-serialization language.
YAML is a recursive acronym for "YAML Ain't Markup Language". As the name might hint its goal is to be human-readable and it is commonly used for configuration files. You will notice below that it is indeed very easy to understand!
Notice that indentations are important in YAML. You can learn more about the syntax here.
A basic workflow contains three elements in a YAML document. These three elements are:
- name: Yep, you guessed it, the name of the workflow
- (on) triggers: The events that trigger the workflow to be executed
- jobs: The separate jobs that the workflow will execute (a basic workflow might contain only one job).
A simple workflow definition looks like this:
name: Hello World!

on:
  push:
    branches:
      - main

jobs:
  hello_world_job:
    runs-on: ubuntu-20.04
    steps:
      - name: Say hello
        run: |
          echo "Hello World!"
There is one job named hello_world_job, it will be run in a virtual environment with Ubuntu 20.04. The job has just one step named "Say hello", which will run the echo "Hello World!" command in the shell.
So you may ask, when does GitHub trigger a workflow to be started? There are plenty of options to choose from, but generally speaking, you can configure a workflow to start once:
- An event on GitHub occurs such as when someone pushes a commit to a repository or when an issue or pull request is created
- A scheduled event, that is specified using the cron-syntax, happens
- An external event occurs, for example, a command is performed in an external application such as Slack or Discord messaging app
To learn more about which events can be used to trigger workflows, please refer to GitHub Action's documentation.
Exercises 11.3-11.4.
To tie this all together, let us now get GitHub Actions up and running in the example project!
11.3 Hello world!
Create a new Workflow that outputs "Hello World!" to the user. For the setup, you should create the directory .github/workflows and a file hello.yml to your repository.
To see what your GitHub Action workflow has done, you can navigate to the Actions tab in GitHub where you should see the workflows in your repository and the steps they implement. The output of your Hello World workflow should look something like this with a properly configured workflow.
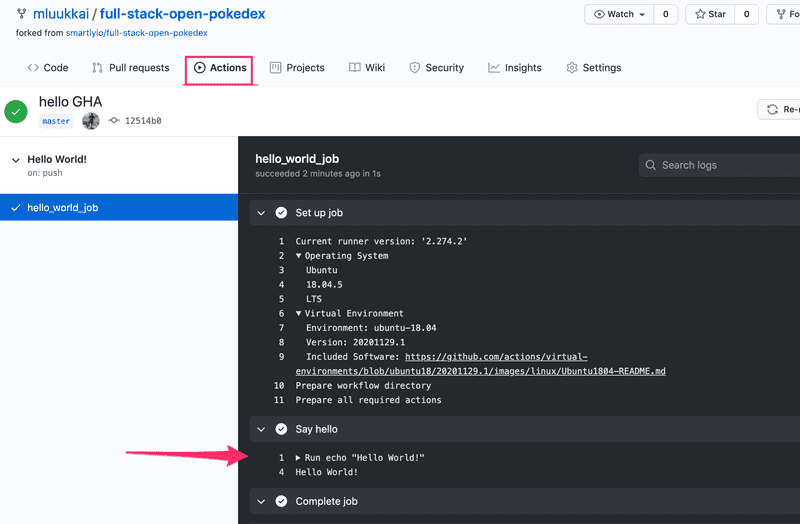
You should see the "Hello World!" message as an output. If that's the case then you have successfully gone through all the necessary steps. You have your first GitHub Actions workflow active!
Note that GitHub Actions also informs you on the exact environment (operating system, and its setup) where your workflow is run. This is important since if something surprising happens, it makes debugging so much easier if you can reproduce all the steps in your machine!
11.4 Date and directory contents
Extend the workflow with steps that print the date and current directory content in the long format.
Both of these are easy steps, and just running commands date and ls will do the trick.
Your workflow should now look like this
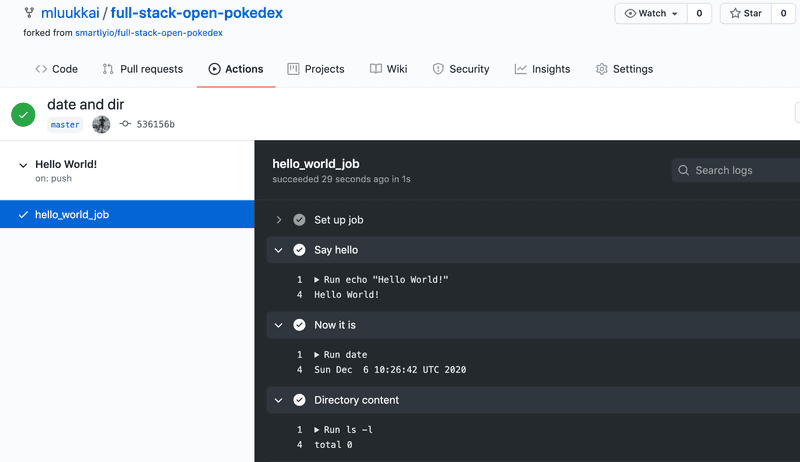
As the output of the command ls -l shows, by default, the virtual environment that runs our workflow does not have any code!
Setting up lint, test and build steps
After completing the first exercises, you should have a simple but pretty useless workflow set up. Let's make our workflow do something useful.
Let's implement a GitHub Action that will lint the code. If the checks don't pass, GitHub Actions will show a red status.
At the start, the workflow that we will save to file pipeline.yml looks like this:
name: Deployment pipeline

on:
  push:
    branches:
      - main

jobs:
Before we can run a command to lint the code, we have to perform a couple of actions to set up the environment of the job.
Setting up the environment
Setting up the environment is an important task while configuring a pipeline. We're going to use an ubuntu-20.04 virtual environment because this is the version of Ubuntu we're going to be running in production.
It is important to replicate the same environment in CI as in production as closely as possible, to avoid situations where the same code works differently in CI and production, which would effectively defeat the purpose of using CI.
Next, we list the steps in the "build" job that the CI would need to perform. As we noticed in the last exercise, by default the virtual environment does not have any code in it, so we need to checkout the code from the repository.
This is an easy step:
name: Deployment pipeline

on:
  push:
    branches:
      - main

jobs:
  simple_deployment_pipeline:    runs-on: ubuntu-20.04    steps:      - uses: actions/checkout@v4
The uses keyword tells the workflow to run a specific action. An action is a reusable piece of code, like a function. Actions can be defined in your repository in a separate file or you can use the ones available in public repositories.
Here we're using a public action actions/checkout and we specify a version (@v4) to avoid potential breaking changes if the action gets updated. The checkout action does what the name implies: it checkouts the project source code from Git.
Secondly, as the application is written in JavaScript, Node.js must be set up to be able to utilize the commands that are specified in package.json. To set up Node.js, actions/setup-node action can be used. Version 20 is selected because it is the version the application is using in the production environment.
# name and trigger not shown anymore...

jobs:
  simple_deployment_pipeline:
    runs-on: ubuntu-20.04
    steps:
      - uses: actions/checkout@v4
      - uses: actions/setup-node@v4        with:          node-version: '20'
As we can see, the with keyword is used to give a "parameter" to the action. Here the parameter specifies the version of Node.js we want to use.
Lastly, the dependencies of the application must be installed. Just like on your own machine we execute npm install. The steps in the job should now look something like
jobs:
  simple_deployment_pipeline:
    runs-on: ubuntu-20.04
    steps:
      - uses: actions/checkout@v4
      - uses: actions/setup-node@v4
        with:
          node-version: '20'
      - name: Install dependencies        run: npm install
Now the environment should be completely ready for the job to run actual important tasks in!
Lint
After the environment has been set up we can run all the scripts from package.json like we would on our own machine. To lint the code all you have to do is add a step to run the npm run eslint command.
jobs:
  simple_deployment_pipeline:
    runs-on: ubuntu-20.04
    steps:
      - uses: actions/checkout@v4
      - uses: actions/setup-node@v4
        with:
          node-version: '20'
      - name: Install dependencies
        run: npm install
      - name: Check style        run: npm run eslint
Note that the name of a step is optional, if you define a step as follows
- run: npm run eslintthe command that is run is used as the default name.
Exercises 11.5.-11.9.
11.5 Linting workflow
Implement or copy-paste the "Lint" workflow and commit it to the repository. Use a new yml file for this workflow, you may call it e.g. pipeline.yml.
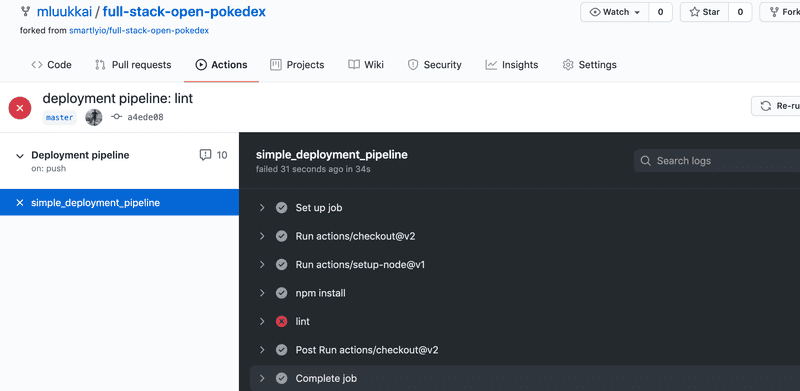
Push your code and navigate to "Actions" tab and click on your newly created workflow on the left. You should see that the workflow run has failed:
11.6 Fix the code
There are some issues with the code that you will need to fix. Open up the workflow logs and investigate what is wrong.
A couple of hints. One of the errors is best to be fixed by specifying proper env for linting, see here how it can be done . One of the complaints concerning console.log statement could be taken care of by simply silencing the rule for that specific line. Ask google how to do it.
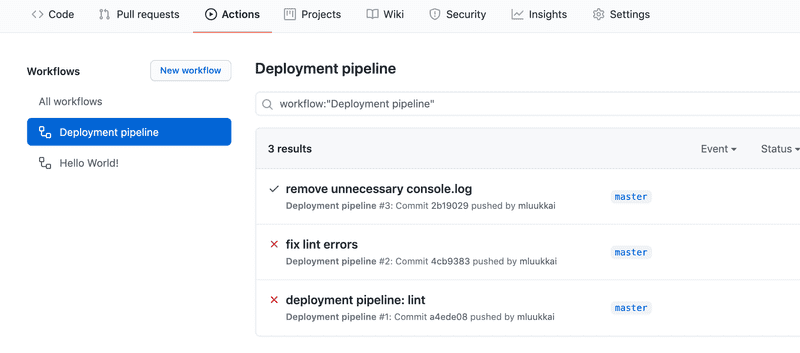
Make the necessary changes to the source code so that the lint workflow passes. Once you commit new code the workflow will run again and you will see updated output where all is green again:
11.7 Building and testing
Let's expand on the previous workflow that currently does the linting of the code. Edit the workflow and similarly to the lint command add commands for build and test. After this step outcome should look like this
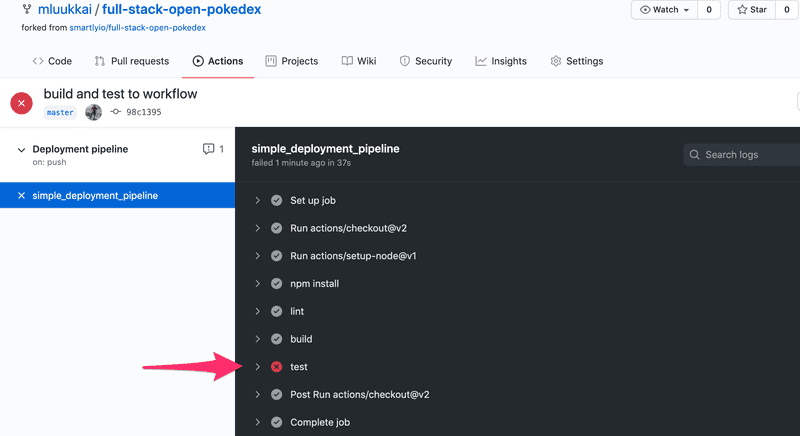
As you might have guessed, there are some problems in code...
11.8 Back to green
Investigate which test fails and fix the issue in the code (do not change the tests).
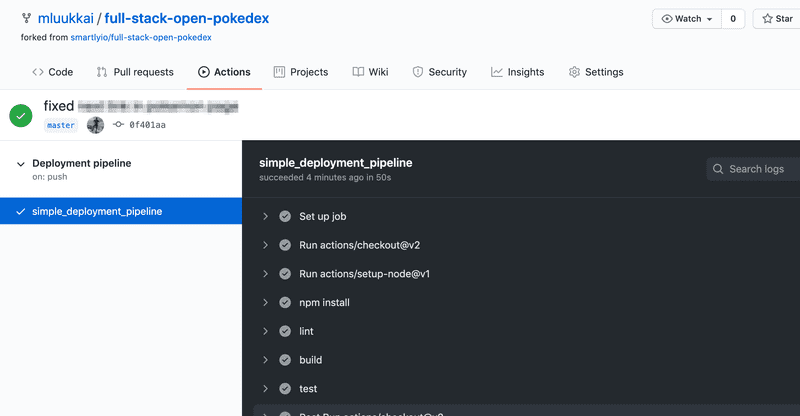
Once you have fixed all the issues and the Pokedex is bug-free, the workflow run will succeed and show green!
11.9 Simple end-to-end tests
The current set of tests uses Jest to ensure that the React components work as intended. This is essentially the same thing that is done in the section Testing React apps of part 5 with Vitest.
Testing components in isolation is quite useful but that still does not ensure that the system as a whole works as we wish. To have more confidence about this, let us write a couple of really simple end-to-end tests similarly we did in section part 5. You could use Playwright or Cypress for the tests.
No matter which you choose, you should extend Jest-definition in package.json to prevent Jest from trying to run the e2e-tests. Assuming that directory e2e-tests is used for e2e-tests, the definition is:
{
  // ...
  "jest": {
    "testEnvironment": "jsdom",
    "testPathIgnorePatterns": ["e2e-tests"]  }
}
Playwright
Set Playwright up (you'll find here all the info you need) to your repository. Note that in contrast to part 5, you should now install Playwright to the same project with the rest of the code!
Use this test first:
const { test, describe, expect, beforeEach } = require('@playwright/test')

describe('Pokedex', () => {
  test('front page can be opened', async ({ page }) => {
     await page.goto('')
    await expect(page.getByText('ivysaur')).toBeVisible()
    await expect(page.getByText('Pokémon and Pokémon character names are trademarks of Nintendo.')).toBeVisible()
  })
})
Note is that although the page renders the Pokemon names with an initial capital letter, the names are actually written with lowercase letters in the source, so you should test for ivysaur instead of Ivysaur!
Define a npm script test:e2e for running the e2e tests from the command line.
Remember that the Playwright tests assume that the application is up and running when you run the test! Instead of starting the app manually, you should now configure a Playwright development server to start the app while tests are executed, see here how that can be done.
Ensure that the test passes locally.
Once the end-to-end test works in your machine, include it in the GitHub Action workflow. That should be pretty easy by following this.
Cypress
Set Cypress up (you'll find here all the info you need) and use this test first:
describe('Pokedex', function() {
  it('front page can be opened', function() {
    cy.visit('http://localhost:5000')
    cy.contains('ivysaur')
    cy.contains('Pokémon and Pokémon character names are trademarks of Nintendo.')
  })
})
Define a npm script test:e2e for running the e2e tests from the command line.
Note is that although the page renders the Pokemon names with an initial capital letter, the names are actually written with lowercase letters in the source, so you should test for ivysaur instead of Ivysaur!
Ensure that the test passes locally. Remember that the Cypress tests assume that the application is up and running when you run the test! If you have forgotten the details, please see part 5 how to get up and running with Cypress.
Once the end-to-end test works in your machine, include it in the GitHub Action workflow. By far the easiest way to do that is to use the ready-made action cypress-io/github-action. The step that suits us is the following:
- name: e2e tests
  uses: cypress-io/github-action@v5
  with:
    command: npm run test:e2e
    start: npm run start-prod
    wait-on: http://localhost:5000
Three options are used: command specifies how to run Cypress tests, start gives npm script that starts the server, and wait-on says that before the tests are run, the server should have started on url http://localhost:5000.
Note that you need to build the app in GitHub Actions before it can be started in production mode!
Once the pipeline works...
Once you are sure that the pipeline works, write another test that ensures that one can navigate from the main page to the page of a particular Pokemon, e.g. ivysaur. The test does not need to be a complex one, just check that when you navigate to a link, the page has some proper content, such as the string chlorophyll in the case of ivysaur.
Note the Pokemon abilities are written with lowercase letters in the source code (the capitalization is done in CSS), so do not test for Chlorophyll but rather chlorophyll.
The end result should be something like this
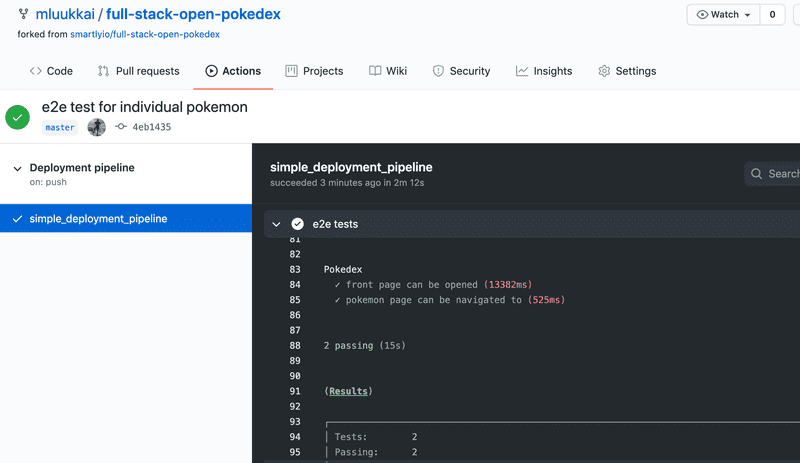
End-to-end tests are nice since they give us confidence that software works from the end user's perspective. The price we have to pay is the slower feedback time. Now executing the whole workflow takes quite much longer.