e
React Router, UI frameworks
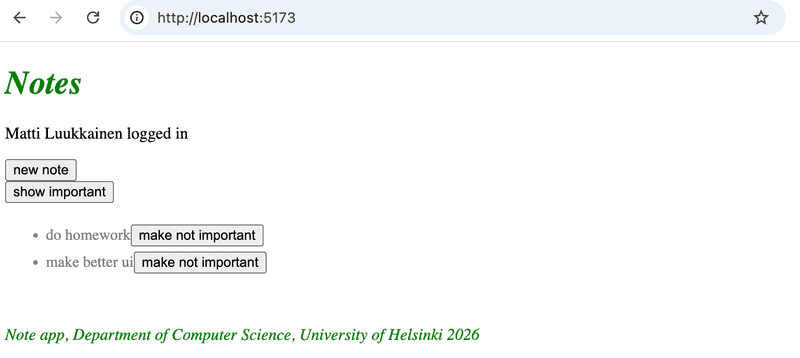
Our app's user interface is currently quite basic:
We want to change that. Let's start with the app's navigation structure.
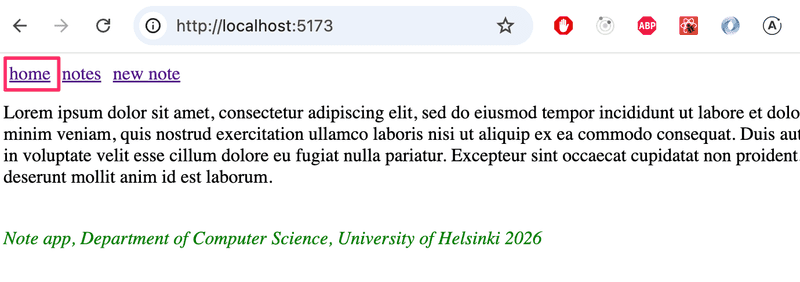
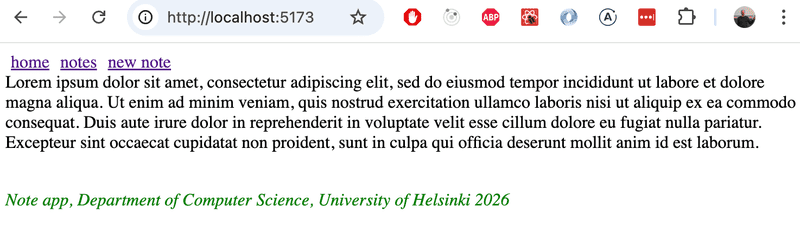
It is very common for web apps to have a navigation bar that allows users to switch between different views within the app. Our note-taking app could include a home page:
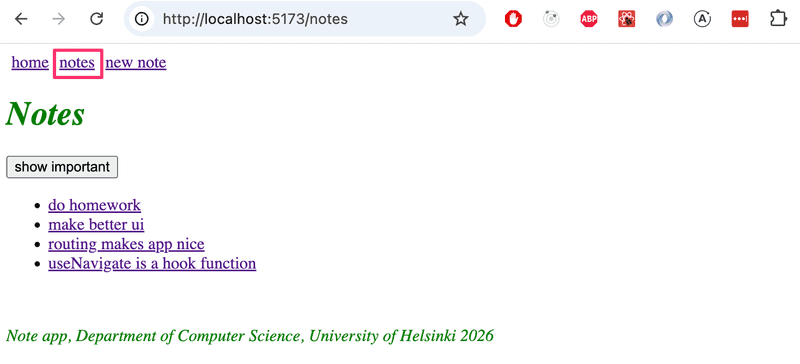
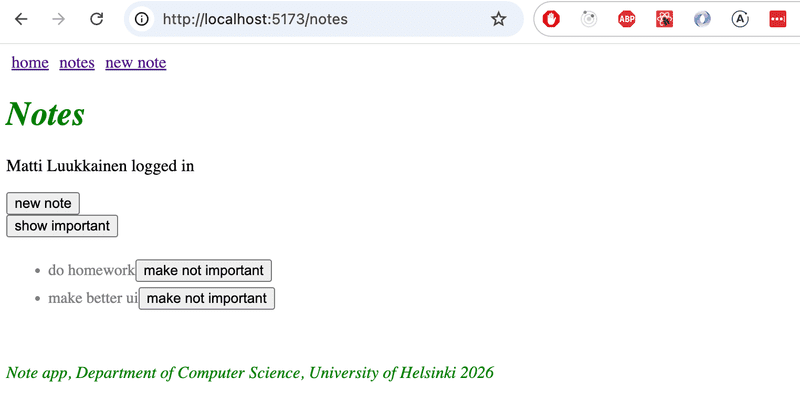
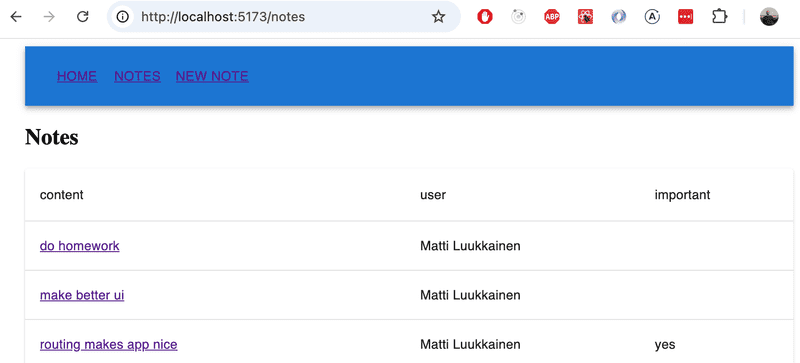
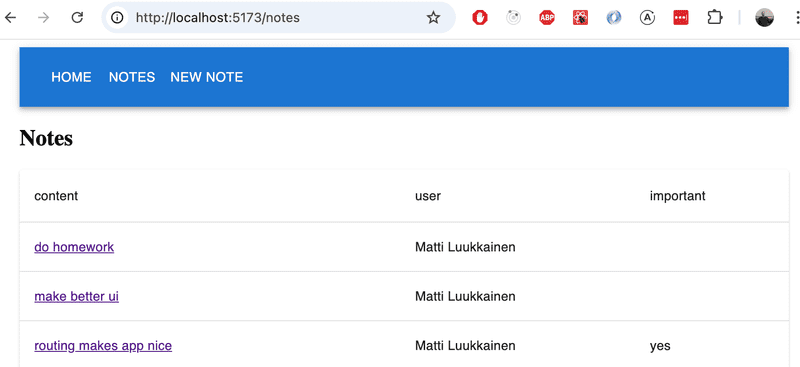
and a separate page for viewing notes:
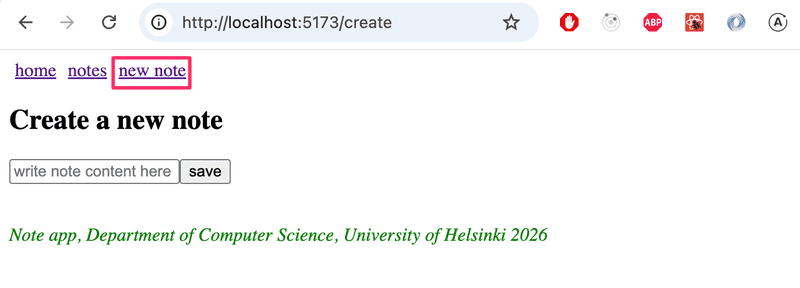
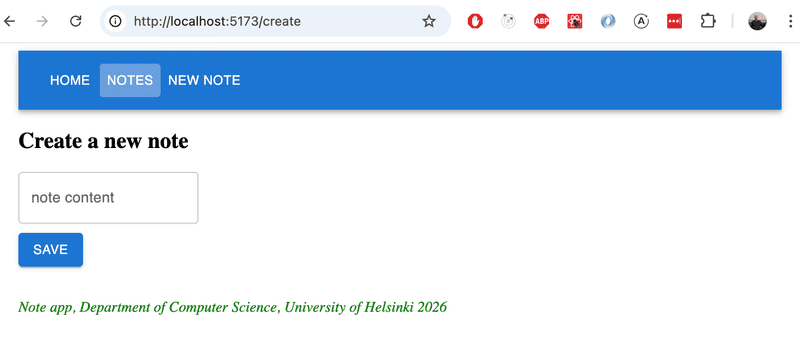
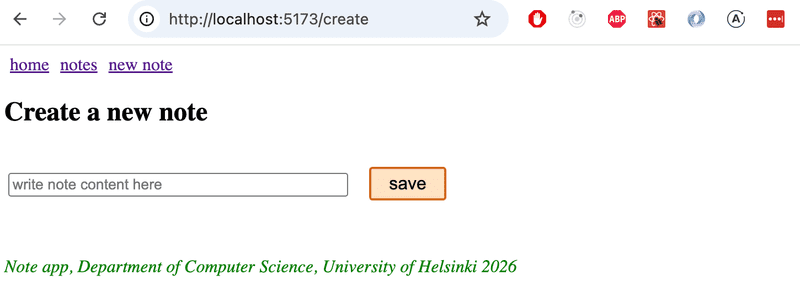
as well as a page for creating notes:
In an old-school web application, switching between pages displayed by the application involved the browser sending a new HTTP GET request to the server and then rendering the HTML code returned by the server, which corresponded to the new view.
In single-page applications, however, you are actually on the same page the entire time, and JavaScript code executed in the browser creates the illusion of different "pages." If HTTP requests are made when changing views, they are used solely to fetch JSON-formatted data that may be required to display the new view.
An application with a navigation bar and multiple views would be easy to implement with React, for example, by having the application state page remember which page the user is on, and rendering the correct view based on this:
const App = () => {
  const [page, setPage] = useState('home')

 const  toPage = (page) => (event) => {
    event.preventDefault()
    setPage(page)
  }

  const content = () => {
    if (page === 'home') {
      return <Home />
    } else if (page === 'notes') {
      return <Notes />
    } else if (page === 'users') {
      return <Users />
    }
  }

  return (
    <div>
      <div>
        <a href="" onClick={toPage('home')} >
          home
        </a>
        <a href="" onClick={toPage('notes')}>
          notes
        </a>
        <a href="" onClick={toPage('users')} >
          users
        </a>
      </div>

      {content()}
    </div>
  )
}
However, this method is not optimal: the website’s URL remains the same even when you’re on a different view. Each view should have its own URL, though, so that users can, for example, bookmark pages. Furthermore, the browser’s back button does not work logically if the pages do not have their own addresses; that is, clicking the back button does not take you to the previously viewed view of the application but somewhere else entirely.
React Router
Fortunately, the React Router library offers an excellent solution for managing navigation in a React application.
Install React Router:
npm install react-router-domCreate a new component that serves as the application’s main page
const Home = () => {
  return (
    <div>
      Lorem ipsum dolor sit amet, consectetur adipiscing elit, sed do eiusmod tempor incididunt ut labore et dolore magna aliqua. Ut enim ad minim veniam, quis nostrud exercitation ullamco laboris nisi ut aliquip ex ea commodo consequat. Duis aute irure dolor in reprehenderit in voluptate velit esse cillum dolore eu fugiat nulla pariatur. Excepteur sint occaecat cupidatat non proident, sunt in culpa qui officia deserunt mollit anim id est laborum.
    </div>
  )
}

export default Home
We’ll extract the app’s previous main view (that was in the component App) into its own component, but move the handling of the notes state outside the component:
// list of notes passed as a parameter
const NoteList = ({ notes }) => {  // content mostly the same as in the App component
  // reference to NoteForm is removed
}
The App component now changes as follows
import { useState, useEffect } from 'react'
import noteService from './services/notes'

import {
  BrowserRouter as Router,
  Routes, Route, Link
} from 'react-router-dom'
import NoteList from './components/NoteList'
import Home from './components/Home'
import Footer from './components/Footer'
import NoteForm from './components/NoteForm'

const App = () => {
  const [notes, setNotes] = useState([])

  useEffect(() => {
    noteService.getAll().then(initialNotes => {
      setNotes(initialNotes)
    })
  }, [])

  const addNote = noteObject => {
    noteService.create(noteObject).then(returnedNote => {
      setNotes(notes.concat(returnedNote))
    })
  }

  const padding = {
    padding: 5
  }

  return (
    <Router>      <div>        <Link style={padding} to="/">home</Link>        <Link style={padding} to="/notes">notes</Link>        <Link style={padding} to="/create">new note</Link>      </div>
      <Routes>        <Route path="/notes" element={          <NoteList notes={notes} />        } />        <Route path="/create" element={          <NoteForm createNote={addNote}/>        } />        <Route path="/" element={<Home />} />      </Routes>      <Footer />    </Router>  )
}

export default App
Routing, that is, the conditional rendering of components based on the browser’s URL, is enabled by placing components as children of the Router component, i.e., inside Router tags.
First, the application’s navigation bar is defined using the Link components. The to attribute specifies how the browser’s URL is changed when the link is clicked:
<div>
  <Link style={padding} to="/">home</Link>
  <Link style={padding} to="/notes">notes</Link>
  <Link style={padding} to="/create">new note</Link>
</div>
Next, the application’s routing is defined using the Routes component. Inside the component, we use Route to define a set of rules and the corresponding renderable components:
<Routes>
  <Route path="/notes" element={
    <NoteList notes={notes} />
  } />
  <Route path="/create" element={
    <NoteForm createNote={addNote}/>
  } />
  <Route path="/" element={<Home />} />
</Routes>
If you are at the application's root URL, the component Home is rendered:
When you click "notes" in the navigation bar, the address in the browser's address bar changes to notes, and the component NoteList is rendered:
Similarly, when you click "new note," the URL becomes create, and the NoteForm component is rendered.
On a normal web page, changing the address in the browser’s address bar causes the page to reload. However, when using React Router, this does not happen, instead, routing is handled entirely via JavaScript on the frontend.
The Router component we use is BrowserRouter:
import {
  BrowserRouter as Router,  Routes, Route, Link
} from 'react-router-dom'
According to the documentation
BrowserRouter is a Router that uses the HTML5 history API (pushState, replaceState and the popstate event) to keep your UI in sync with the URL.
BrowserRouter uses the HTML5 History API to allow the URL in the browser's address bar to be used for internal "routing" within a React application, meaning that even if the URL in the address bar changes, the page content is manipulated solely via JavaScript, and the browser does not load new content from the server. However, the browser’s behavior regarding the back and forward functions and bookmarking is intuitive—it works just like on traditional websites.
The current code for the application is available in its entirety on GitHub, in the branch part5-10.
Parameterized route
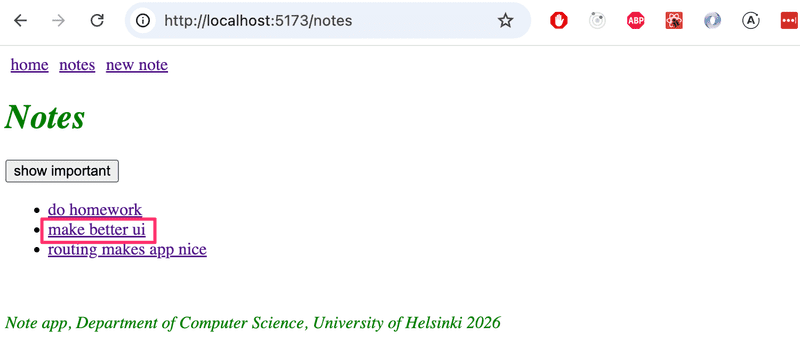
Let’s move the details of a single note to its own view, which can be accessed by clicking the note’s name:
The clickability of the name has been implemented in the NoteList component as follows:
import { Link } from 'react-router-dom'
const NoteList = ({ notes }) => {
  // ...

  return (
    <div>
      <h1>Notes</h1>
      <Notification message={errorMessage} />

      {!user && loginForm()}

      <div>
        <button onClick={() => setShowAll(!showAll)}>
          show {showAll ? 'important' : 'all'}
        </button>
      </div>
      <ul>
        {notesToShow.map(note => (
          <li key={note.id}>
            <Link to={`/notes/${note.id}`}>{note.content}</Link>          </li>
        ))}
      </ul>
    </div>
  )
}

export default NoteList
So Link is in use again. For example, clicking the name of a note whose id is 12345 causes the browser’s URL to update to notes/12345.
The parameterized URL is defined in the routing within the App component as follows:
<Router>
  // ...

  <Routes>
    <Route path="/notes/:id" element={      <Note notes={notes} toggleImportanceOf={toggleImportanceOf} />     } />    <Route path="/notes" element={<Notes notes={notes} />} />
    <Route path="/users" element={user ? <Users /> : <Navigate replace to="/login" />} />
    <Route path="/login" element={<Login onLogin={login} />} />
    <Route path="/" element={<Home />} />
  </Routes>
</Router>
The route that renders the view for a single note is defined in the "Express style" by marking the path parameter with the notation :id as follows:
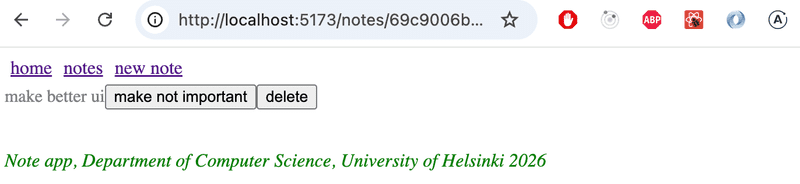
<Route path="/notes/:id" element={<Note notes={notes} ... />} />When the browser navigates to the unique URL of a note, e.g., /notes/12345, the Note component is rendered, which we have now had to modify slightly:
import { useParams } from 'react-router-dom'
const Note = ({ notes, toggleImportance }) => {
  const id = useParams().id  const note = notes.find(n => n.id === id)
  const label = note.important ? 'make not important' : 'make important'

  return (
    <li className="note">
      <span>{note.content}</span>
      <button onClick={() => toggleImportance(id)}>{label}</button>
    </li>
  )
}

export default Note
Unlike before, the Note component now receives all notes via the notes prop, and it can access the unique part of the URL, specifically, the id of the note to be displayed, using the React Router function useParams.
useNavigate
The backend already supports deleting notes. To implement this, let’s add a button to the individual note page in the app:
Let’s add a handler to the App component that performs the deletion, and pass it to the Note component:
const App = () => {

  const deleteNote = (id) => {    noteService.remove(id).then(() => {      setNotes(notes.filter(n => n.id !== id))    })  }
  return (
      // ...

      <Routes>
        <Route path="/notes/:id" element={
          <Note
            notes={notes}
            toggleImportanceOf={toggleImportanceOf}
            deleteNote={deleteNote}          />
        } />
        <Route path="/notes" element={
          <NoteList notes={notes} />
        } />
        <Route path="/create" element={
          <NoteForm createNote={addNote}/>
        } />
        <Route path="/" element={<Home />} />
      </Routes>

      <Footer />
    </Router>
  )
}
Component Note changes as follows:
import { useParams, useNavigate } from 'react-router-dom'

const Note = ({ notes, toggleImportanceOf, deleteNote }) => {  const id = useParams().id
  const navigate = useNavigate()  const note = notes.find(n => n.id === id)

  const label = note.important ? 'make not important' : 'make important'

  const handleDelete = () => {    if (window.confirm(`Delete note "${note.content}"?`)) {      deleteNote(id)      navigate('/notes')    }  }
  return (
    <li className="note">
      <span>{note.content}</span>
      <button onClick={() => toggleImportanceOf(id)}>{label}</button>
      <button onClick={handleDelete}>delete</button>    </li>
  )
}

export default Note
When a note is deleted, the user is navigated back to the page listing all notes. This is done by calling the function returned by React Router’s useNavigate with the desired URL: navigate('/notes').
Functions useParams and useNavigate from the React Router library, are both hook functions, just like, for example, the useState and useEffect we’ve used many times. As we recall from Part 1, there are certain rules associated with using hook functions.
Let’s also modify the NoteForm component so that after adding a new note, the user is navigated to the page containing all notes:
import { useState } from 'react'
import { useNavigate } from 'react-router-dom'
const NoteForm = ({ createNote }) => {
  const [newNote, setNewNote] = useState('')
  const navigate = useNavigate()
  const addNote = event => {
    event.preventDefault()
    createNote({
      content: newNote,
      important: true
    })

    navigate('/notes')    setNewNote('')
  }

  return (
    <div>
      <h2>Create a new note</h2>

      <form onSubmit={addNote}>
        <input
          value={newNote}
          onChange={event => setNewNote(event.target.value)}
          placeholder="write note content here"
        />
        <button type="submit">save</button>
      </form>
    </div>
  )
}
Parameterized Route Revisited
There is one slightly annoying issue with the app. The Note component receives all notes as props, even though it only displays the one whose id matches the parameterized part of the URL:
const Note = ({ notes, toggleImportance }) => {
  const id = useParams().id
  const note = notes.find(n => n.id === Number(id))
  // ...
}
Would it be possible to modify the application so that Note receives only the note to be displayed as a prop:
import { useParams, useNavigate } from 'react-router-dom'

const Note = ({ note, id, toggleImportanceOf, deleteNote }) => {  const id = useParams().id
  const navigate = useNavigate()

  // ...

  return (
    <li className="note">
      <span>{note.content}</span>
      <button onClick={() => toggleImportanceOf(id)}>{label}</button>
      <button onClick={handleDelete}>delete</button>
    </li>
  )
}

export default Note
One way is to determine the id of the note to be displayed within the component using React Router's useMatch hook function.
It is not possible to use the useMatch hook in the same component that defines the routable part of the application. Let’s move the Router component outside of App:
ReactDOM.createRoot(document.getElementById('root')).render(
  <Router>    <App />
  </Router>)
Component App becomes:
import {
  // ...
  useMatch} from 'react-router-dom'

const App = () => {
  // ...

  const match = useMatch('/notes/:id')  const note = match    ? notes.find(note => note.id === match.params.id)    : null
  return (
    <div>
      <div>
        <Link style={padding} to="/">home</Link>
        // ...
      </div>

      <Routes>
        <Route path="/notes/:id" element={
          <Note
            note={note}            toggleImportanceOf={toggleImportanceOf}
            deleteNote={deleteNote}
          />
        } />
        <Route path="/notes" element={
          <NoteList notes={notes} />
        } />
        <Route path="/create" element={
          <NoteForm createNote={addNote}/>
        } />
        <Route path="/" element={<Home />} />
      </Routes>

      <div>
        <em>Note app, Department of Computer Science 2026</em>
      </div>
    </div>
  )
}
Every time the App component is rendered (which, in practice, happens whenever the URL in the browser's address bar changes) the following command is executed
const match = useMatch('/notes/:id')If the URL is in the form /notes/:id, i.e., corresponds to the URL of a single note, the variable match is assigned an object that can be used to determine the parameterized part of the path, i.e., the note's id. This allows us to retrieve the note to be rendered:
const note = match
  ? notes.find(note => note.id === match.params.id)
  : null
There is still a small bug in our application. If the browser is reloaded on a single note page, an error occurs:
The problem arises because the page is attempted to be rendered before the notes have been fetched from the backend. We can resolve this issue with conditional rendering:
const Note = ({ note, toggleImportanceOf, deleteNote }) => {
  const id = useParams().id
  const navigate = useNavigate()

  if(!note) {    return null  }
  return (
    //...
  )
}
The app has one more annoying feature: the login logic is still all on the page that lists the notes. However, we’ll leave the functionality in this somewhat incomplete state for now.
The current code for the app is available in its entirety on GitHub, in the part5-11 branch.
Exercises 5.24–5.28.
5.24: routed blogs, step1
Add React Router to the blogs application so that clicking the links in the navigation bar allows you to control which view is displayed.
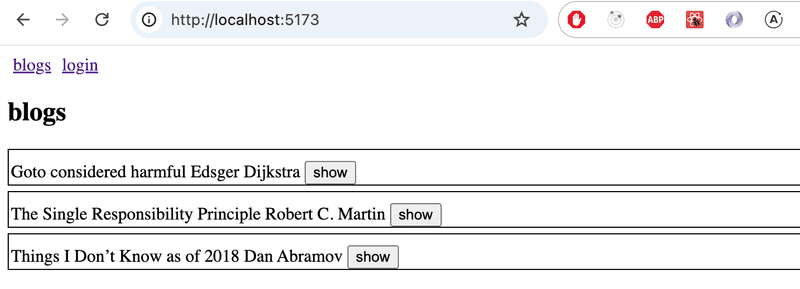
At the root of the application, i.e., the path /, a list of all blogs is displayed:
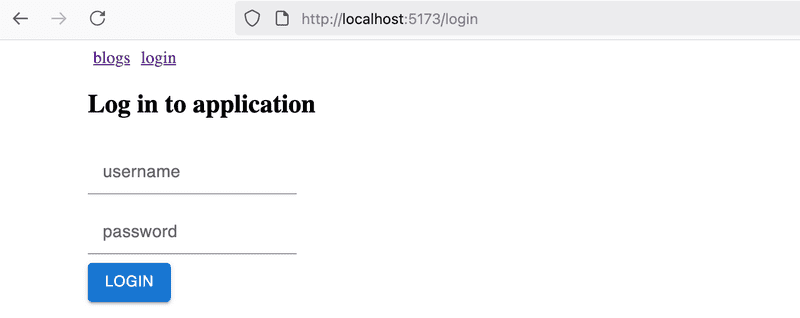
The path /login allows users to log in

If the user is logged in, a logout button appears in the navigation bar:
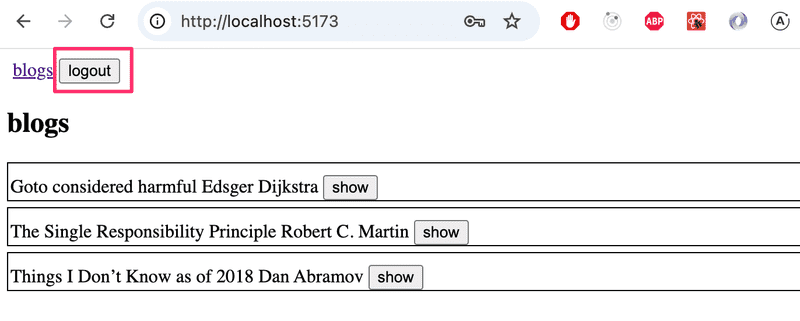
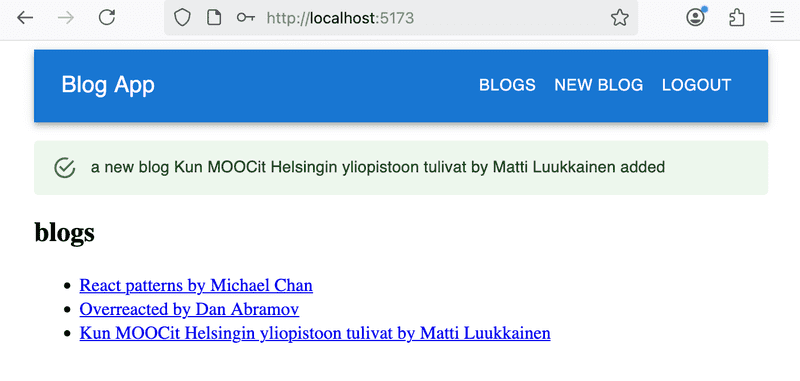
After logging in and out, the user should be directed to the page that lists all blogs.
At this stage, you don’t need to worry about creating blogs yet.
5.25: routed blogs, step2
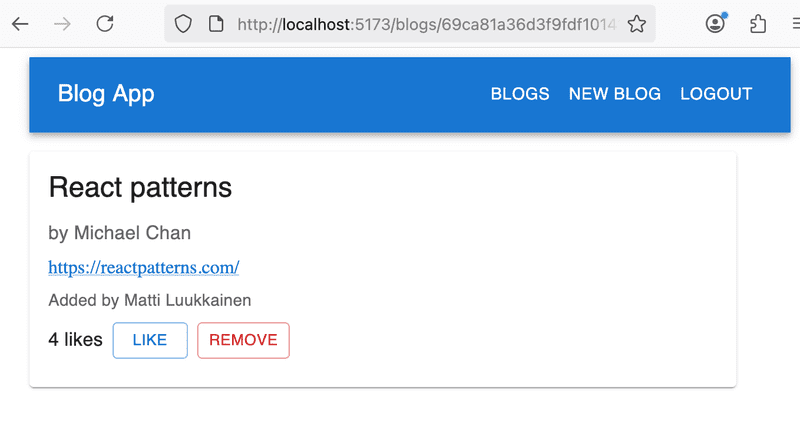
Implement a view in the application that displays information for a single blog post:
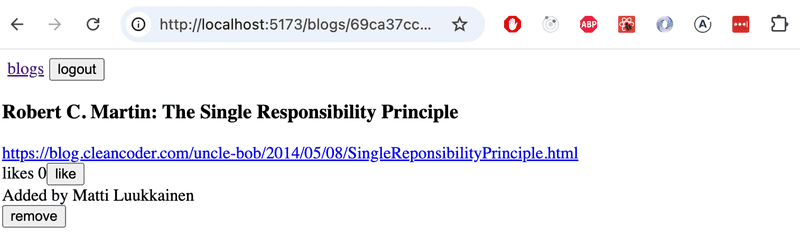
Users navigate to the single blog post view from the blog list:
Make sure that the "Like" feature for blogs still works! Also modify the functionality so that only logged-in users can "Like" a blog.
5.26: routed blogs, step3
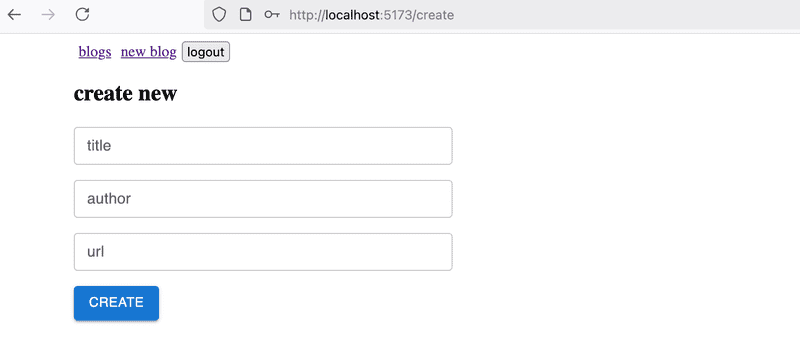
Create a new view for creating a new blog, which logged-in users can access via the navigation:
Adding a new blog and deleting an existing blog should redirect the user to the all blogs view
5.27: routed blogs, step4
The app’s usability and appearance are now better than before. Unfortunately, some of the tests have broken.
Now modify the tests for the single blog view created in Vitest as follows
- Blog information and the number of likes are displayed to unauthenticated users, buttons are not displayed
- Authenticated users who are not the blog’s creator are shown only the like button
- The blog’s creator is also shown the delete button
5.28: routed blogs, step5
Next up is fixing the end-to-end tests created with Playwright. The tests we wrote earlier are completely broken, and we’ll have to make major changes to them.
Create tests for the following scenarios:
- Login succeeds with the correct username/password combination
- Login fails if the username/password is incorrect
- A logged-in user can create a blog
- A logged-in user can like blogs
- A logged-in user can delete a blog
So, sorting blogs by likes is not being tested right now.
UI libraries
In Part 2, we already looked at two ways to add styles: the old-school single CSS file and inline styles. In this section, we’ll look at a few more ways.
One approach to defining an app’s styles is to use a “UI framework,” or, in other words, a UI style library.
The first UI framework to gain widespread popularity was Bootstrap, developed by Twitter. During the past handful of years, UI frameworks have been popping up like mushrooms after rain. The selection is so vast that it’s not even worth trying to make an exhaustive list here.
Many UI frameworks include predefined themes for web applications as well as "components", such as buttons, menus, and tables. The term "component" is written in quotes above because it does not quite refer to the same thing as a React component. Most often, UI frameworks are used by including the framework’s CSS style sheets and JavaScript code in the application.
Many UI frameworks have been adapted into React-friendly versions, where the "components" defined by the UI framework have been converted into React components. For example, there are a couple of React versions of Bootstrap, the most popular of which is React-Bootstrap.
Instead of Bootstrap, let’s next look at what is perhaps the most popular UI framework right now: the React library MaterialUI, which implements Google’s Material Design design language.
Let us install the library:
npm install @mui/material @emotion/react @emotion/styledWhen using MaterialUI, the entire app’s content is usually rendered inside the Container component:
import { Container } from '@mui/material'

const App = () => {
  // ...
  return (
    <Container>
      // ...
    </Container>
  )
}
Table
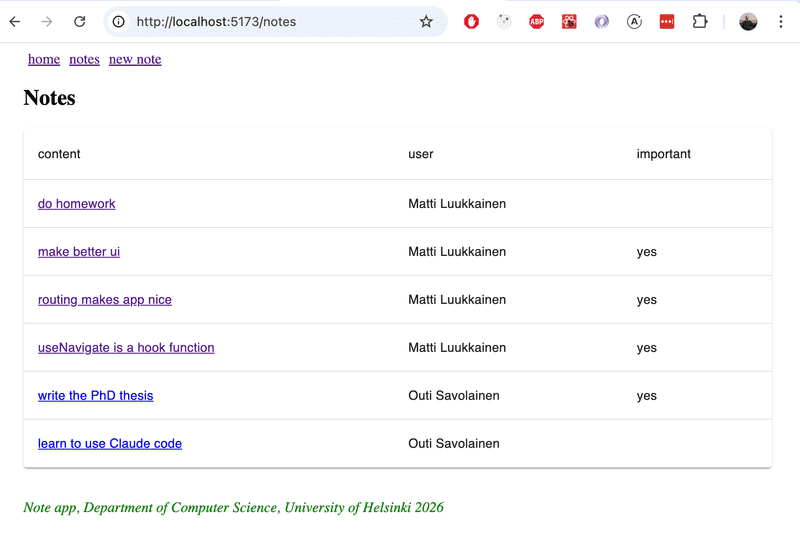
Let's start with the NoteList component and render the list of notes as a table, which also displays the user who created each note:
import { useState, useEffect } from 'react'

import { Table, TableBody, TableCell, TableContainer, TableHead, TableRow, Paper } from '@mui/material'

//...

const NoteList = ({ notes }) => {

  // ...

  return (
    <div>
      // ...
      <h2>Notes</h2>

      <TableContainer component={Paper}>
        <Table>
          <TableHead>
            <TableRow>
              <TableCell>content</TableCell>
              <TableCell>user</TableCell>
              <TableCell>important</TableCell>
            </TableRow>
          </TableHead>
          <TableBody>
            {notes.map(note => (
              <TableRow key={note.id}>
                <TableCell>
                  <Link to={`/notes/${note.id}`}>
                    {note.content}
                  </Link>
                </TableCell>
                <TableCell>
                  {note.user.name}
                </TableCell>
                <TableCell>
                  {note.important ? 'yes': ''}
                </TableCell>
              </TableRow>
            ))}
          </TableBody>
        </Table>
      </TableContainer>

    </div>
  )
}

export default NoteList
The table looks like this:
Form
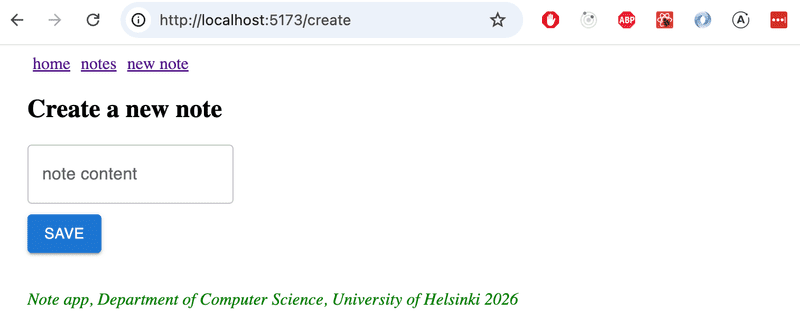
Next, let’s improve the view for creating a new note NoteForm using the TextField and Button components:
import { TextField, Button } from '@mui/material'

// ...

const NoteForm = ({ createNote }) => {
  // ...

  return (
    <div>
      <h2>Create a new note</h2>

      <form onSubmit={addNote}>
        <TextField
          label="note content"
          value={newNote}
          onChange={event => setNewNote(event.target.value)}
        />
        <div>
          <Button type="submit" variant="contained" style={{ marginTop: 10 }}>
            save
          </Button>
        </div>
      </form>
    </div>
  )
}

export default NoteForm
The result is elegant:
Notifications
Let’s improve the app’s notification component using MaterialUI’s Alert component:
import { Alert } from '@mui/material'

const Notification = ({ notification }) => {
  if (notification === null) {
    return null
  }

  return (
    <Alert style={{ marginTop: 10, marginBottom: 10 }} severity={notification.type}>
      {notification.text}
    </Alert>
  )
}

export default Notification
Move the notification component and its state management to the App component:
const App = () => {
const [notes, setNotes] = useState([])
const [notification, setNotification] = useState(null)
// ...
const addNote = noteObject => {
noteService.create(noteObject).then(returnedNote => {
setNotes(notes.concat(returnedNote))
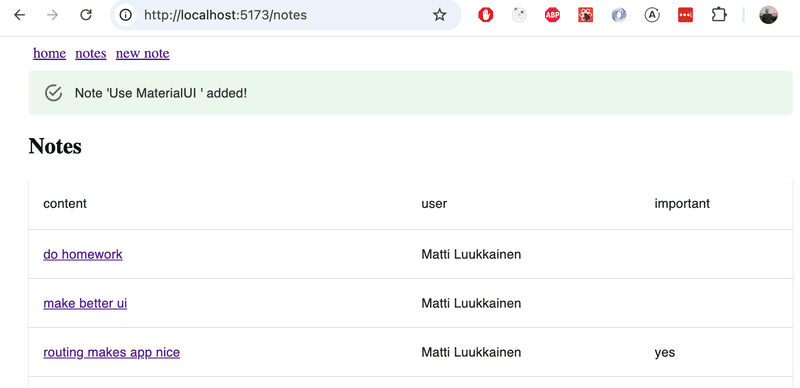
setNotification({ text: `Note '${returnedNote.content}' added!`, type: 'success' }) setTimeout(() => {
setNotification(null)
}, 5000)
})
}
return (
<Container>
<div>
<Link style={padding} to="/">home</Link>
<Link style={padding} to="/notes">notes</Link>
<Link style={padding} to="/create">new note</Link>
</div>
<Notification notification={notification} />
<Routes>
<Route path="/notes/:id" element={
<Note
note={note}
toggleImportanceOf={toggleImportanceOf}
deleteNote={deleteNote}
/>
} />
<Route path="/notes" element={
<NoteList notes={notes} setNotification={setNotification} />
} />
<Route path="/create" element={
<NoteForm createNote={addNote} />
} />
<Route path="/" element={<Home />} />
</Routes>
<Footer />
</Container>
)
}Alert has a sleek design:
Navigation Menu
The navigation menu is implemented using the AppBar component.
If we apply the example from the documentation directly
<AppBar position="static">
  <Toolbar>
    <Button color="inherit"><Link to="/">home</Link></Button>
    <Button color="inherit"><Link to="/notes">notes</Link></Button>
    <Button color="inherit"><Link to="/create">new note</Link></Button>
  </Toolbar>
</AppBar>
This does provide a working solution, but its appearance isn’t the best possible:
By browsing the documentation, you’ll find a better way: the component prop, which allows you to change how the root element of a MaterialUI component is rendered.
By defining
<Button color="inherit" component={Link} to="/">
  home
</Button>
The Button component is rendered such that its root component is the Link component from the react-router-dom library, to which the to prop, which specifies the path, is passed.
The complete code for the navigation bar is as follows
<AppBar position="static">
  <Toolbar>
    <Button color="inherit" component={Link} to="/">home</Button>
    <Button color="inherit" component={Link} to="/notes">notes</Button>
    <Button color="inherit" component={Link} to="/create">new note</Button>
  </Toolbar>
</AppBar>
and the result looks just as we want:
However, we notice that when the mouse is moved over the navigation bar, the hover indicator is too subtle. Let’s fix this by defining a slightly better background color for these situations:
const style = { '&:hover': { bgcolor: 'rgba(255,255,255,0.3)' } }

return (
  <Container>
    <AppBar position="static">
      <Toolbar>
        <Button color="inherit" component={Link} to="/" sx={style}>
          home
        </Button>
        <Button color="inherit" component={Link} to="/notes" sx={style}>
          notes
        </Button>
        <Button color="inherit" component={Link} to="/create" sx={style}>
          new note
        </Button>
      </Toolbar>
    </AppBar>

    // ...
)
We're finally satisfied:
The current code for the app is available in its entirety on GitHub, in the part5-12 branch.
Styled Components
In addition to what we’ve already seen, there are other ways to apply styles to a React app.
The styled-components library, which utilizes ES6’s tagged template literal syntax, offers an interesting approach to defining styles.
Let us install styled-components and use it to make a few stylistic changes to the note-taking app (the version before installing MaterialUI). First, let’s create two style definitions for the components we’ll be using:
import styled from 'styled-components'

const Button = styled.button`
  background: Bisque;
  font-size: 1em;
  margin: 1em;
  padding: 0.25em 1em;
  border: 2px solid Chocolate;
  border-radius: 3px;
`

const Input = styled.input`
  margin: 0.25em;
  width: 300px;
`
The code creates versions of the HTML elements button and input that are styled, and assigns them to the variables Button and Input.
The syntax for defining styles is quite interesting, as CSS definitions are placed inside backtick quotes. This is the ES6’s tagged template literal syntax.
The defined components function like normal button and input elements, and are used in the application in the usual way:
const NoteForm = ({ createNote }) => {
  // ...

  return (
    <div>
      <h2>Create a new note</h2>

      <form onSubmit={addNote}>
        <Input>          value={newNote}
          onChange={event => setNewNote(event.target.value)}
          placeholder="write note content here"
        />
        <Button type="submit">save</Button>      </form>
    </div>
  )
}
The form now looks like this:
Let’s define the following components for adding styles, all of which are enhanced versions of the div elements:
const Page = styled.div`
  padding: 1em;
  background: papayawhip;
`

const Navigation = styled.div`
  background: BurlyWood;
  padding: 1em;
`

const Footer = styled.div`
  background: Chocolate;
  padding: 1em;
  margin-top: 1em;
`
The new components can now be used in the application:
const App = () => {
// ...
return (
<Page> <Navigation> <Link style={padding} to="/">home</Link>
<Link style={padding} to="/notes">notes</Link>
<Link style={padding} to="/create">new note</Link>
</Navigation>
<Routes>
<Route path="/notes/:id" element={
<Note
note={note}
toggleImportanceOf={toggleImportanceOf}
deleteNote={deleteNote}
/>
} />
<Route path="/notes" element={
<NoteList notes={notes} />
} />
<Route path="/create" element={
<NoteForm createNote={addNote}/>
} />
<Route path="/" element={<Home />} />
</Routes>
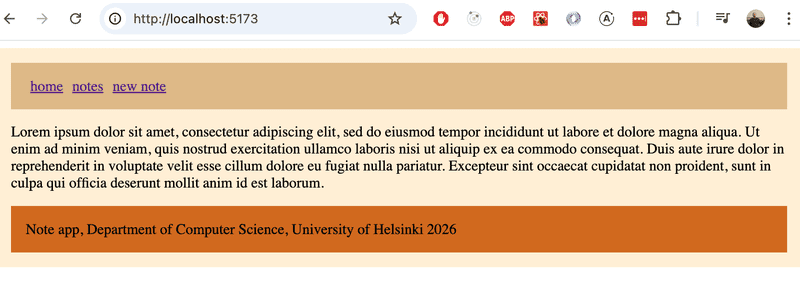
<Footer> Note app, Department of Computer Science, University of Helsinki 2026 </Footer> </Page> )
}The final result is as follows:
Styled-Components has been steadily gaining popularity lately, and it currently seems that many people consider it the best way to define styles for React applications.
Exercises 5.29–5.31
Next, improve the styles of the blog app using either MaterialUI or Styled Components.
5.29: styled blogs, step 1
Add styles to the application’s forms.
Your solution might look something like this. Login form:
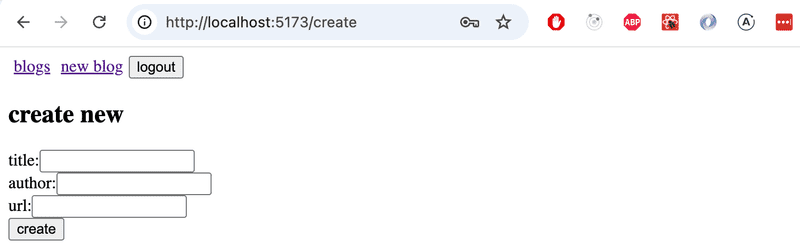
Creating a new blog:
5.30: styled blogs, step2
Now style the app's navigation bar and the component that displays notifications. The result might look something like this:
5.31: styled blogs, step 3
Customize the appearance of the single blog display component as you see fit. Here is an example:
This was the last exercise of the section and it's time to push the code to GitHub and mark the completed exercises in the exercise submission system.