b
Building and configuring environments
In the previous section, we used two different base images: ubuntu and node, and did some manual work to get a simple "Hello, World!" running. The tools and commands we learned during that process will be helpful. In this section, we will learn how to build images and configure environments for our applications. We will start with a regular Express/Node.js backend and build on top of that with other services, including a MongoDB database.
Dockerfile
Instead of modifying a container by copying files inside, we can create a new image that contains the "Hello, World!" application. The tool for this is the Dockerfile. Dockerfile is a simple text file that contains all of the instructions for creating an image. Let's create an example Dockerfile from the "Hello, World!" application.
If you did not already, create a directory on your machine and create a file called Dockerfile inside that directory. Let's also put an index.js containing console.log('Hello, World!') next to the Dockerfile. Your directory structure should look like this:
├── index.js
└── Dockerfile
inside that Dockerfile we will tell the image three things:
- Use the node:20 as the base for our image
- Include the index.js file inside the image, so we don't need to manually copy it into the container
- When we run a container from the image, use Node to execute the index.js file.
The wishes above will translate into a basic Dockerfile. The best location to place this file is usually at the root of the project.
The resulting Dockerfile looks like this:
FROM node:20

WORKDIR /usr/src/app

COPY ./index.js ./index.js

CMD node index.js
FROM instruction will tell Docker that the base for the image should be node:20. COPY instruction will copy the file index.js from the host machine to the file with the same name in the image. CMD instruction tells what happens when docker run is used. CMD is the default command that can then be overwritten with the argument given after the image name. See docker run --help if you forgot.
The WORKDIR instruction was slipped in to ensure we don't interfere with the contents of the image. It will guarantee all of the following commands will have /usr/src/app set as the working directory. If the directory doesn't exist in the base image, it will be automatically created.
If we do not specify a WORKDIR, we risk overwriting important files by accident. If you check the root (/) of the node:20 image with docker run node:20 ls, you can notice all of the directories and files that are already included in the image.
Now we can use the command docker build to build an image based on the Dockerfile. Let's spice up the command with one additional flag: -t, this will help us name the image:
$ docker build -t fs-hello-world .
[+] Building 3.9s (8/8) FINISHED
...
So the result is "Docker please build with tag (you may think of the tag as the name of the resulting image.) fs-hello-world the Dockerfile in this directory". You can point to any Dockerfile, but in our case, a simple dot will mean the Dockerfile is in this directory. That is why the command ends with a period. After the build is finished, you can run it with docker run fs-hello-world:
$ docker run fs-hello-world
Hello, World
As images are just files, they can be moved around, downloaded and deleted. You can list the images you have locally with docker image ls, delete them with docker image rm. See what other command you have available with docker image --help.
One more thing: before it was mentioned that the default command, defined by the CMD in the Dockerfile, can be overwritten if needed. We could e.g. open a bash session to the container and observe it's content:
$ docker run -it fs-hello-world bash
root@2932e32dbc09:/usr/src/app# ls
index.js
root@2932e32dbc09:/usr/src/app#
More meaningful image
Moving an Express server to a container should be as simple as moving the "Hello, World!" application inside a container. The only difference is that there are more files. Thankfully COPY instruction can handle all that. Let's delete the index.js and create a new Express server. Lets use express-generator to create a basic Express application skeleton.
$ npx express-generator
  ...

  install dependencies:
    $ npm install

  run the app:
    $ DEBUG=playground:* npm start
First, let's run the application to get an idea of what we just created. Note that the command to run the application may be different from you, my directory was called playground.
$ npm install
$ DEBUG=playground:* npm start
  playground:server Listening on port 3000 +0ms
Great, so now we can navigate to http://localhost:3000 and the app is running there.
Containerizing that should be relatively easy based on the previous example.
- Use node as base
- Set working directory so we don't interfere with the contents of the base image
- Copy ALL of the files in this directory to the image
- Start with DEBUG=playground:* npm start
Let's place the following Dockerfile at the root of the project:
FROM node:20

WORKDIR /usr/src/app

COPY . .

CMD DEBUG=playground:* npm start
Let's build the image from the Dockerfile and then run it:
docker build -t express-server .
docker run -p 3123:3000 express-server
The -p flag in the run command will inform Docker that a port from the host machine should be opened and directed to a port in the container. The format is -p host-port:application-port.
The application is now running! Let's test it by sending a GET request to http://localhost:3123/.
If yours doesn't work, skip to the next section. There is an explanation why it may not work even if you followed the steps correctly.
Shutting the app down is a headache at the moment. Use another terminal and docker kill command to kill the application. The docker kill will send a kill signal (SIGKILL) to the application to force it to shut down. It needs the name or the id of the container as an argument.
By the way, when using the id as the argument, the beginning of the ID is enough for Docker to know which container we mean.
$ docker container ls
  CONTAINER ID   IMAGE            COMMAND                  CREATED         STATUS         PORTS                                       NAMES
  48096ca3ffec   express-server   "docker-entrypoint.s…"   9 seconds ago   Up 6 seconds   0.0.0.0:3123->3000/tcp, :::3123->3000/tcp   infallible_booth

$ docker kill 48
  48
In the future, let's use the same port on both sides of -p. Just so we don't have to remember which one we happened to choose.
Fixing potential issues we created by copy-pasting
There are a few steps we need to change to create a more comprehensive Dockerfile. It may even be that the above example doesn't work in all cases because we skipped an important step.
When we ran npm install on our machine, in some cases the Node package manager may install operating system specific dependencies during the install step. We may accidentally move non-functional parts to the image with the COPY instruction. This can easily happen if we copy the node_modules directory into the image.
This is a critical thing to keep in mind when we build our images. It's best to do most things, such as to run npm install during the build process inside the container rather than doing those prior to building. The easy rule of thumb is to only copy files that you would push to GitHub. Build artifacts or dependencies should not be copied since those can be installed during the build process.
We can use .dockerignore to solve the problem. The file .dockerignore is very similar to .gitignore, you can use that to prevent unwanted files from being copied to your image. The file should be placed next to the Dockerfile. Here is a possible content of a .dockerignore
.dockerignore
.gitignore
node_modules
Dockerfile
However, in our case, the .dockerignore isn't the only thing required. We will need to install the dependencies during the build step. The Dockerfile changes to:
FROM node:20

WORKDIR /usr/src/app

COPY . .

RUN npm install
CMD DEBUG=playground:* npm start
The npm install can be risky. Instead of using npm install, npm offers a much better tool for installing dependencies, the ci command.
Differences between ci and install:
- install may update the package-lock.json
- install may install a different version of a dependency if you have ^ or ~ in the version of the dependency.
- ci will delete the node_modules folder before installing anything
- ci will follow the package-lock.json and does not alter any files
So in short: ci creates reliable builds, while install is the one to use when you want to install new dependencies.
As we are not installing anything new during the build step, and we don't want the versions to suddenly change, we will use ci:
FROM node:20

WORKDIR /usr/src/app

COPY . .

RUN npm ci
CMD DEBUG=playground:* npm start
Even better, we can use npm ci --omit=dev to not waste time installing development dependencies.
As you noticed in the comparison list; npm ci will delete the node_modules folder so creating the .dockerignore did not matter. However, .dockerignore is an amazing tool when you want to optimize your build process. We will talk briefly about these optimizations later.
Now the Dockerfile should work again, try it with docker build -t express-server . && docker run -p 3123:3000 express-server
Note that we are here chaining two bash commands with &&. We could get (nearly) the same effect by running both commands separately. When chaining commands with && if one command fails, the next ones in the chain will not be executed.
We set an environment variable DEBUG=playground:* during CMD for the npm start. However, with Dockerfiles we could also use the instruction ENV to set environment variables. Let's do that:
FROM node:20

WORKDIR /usr/src/app

COPY . .

RUN npm ci

ENV DEBUG=playground:*
CMD npm start
If you're wondering what the DEBUG environment variable does, read here.
Dockerfile best practices
There are 2 rules of thumb you should follow when creating images:
- Try to create as secure of an image as possible
- Try to create as small of an image as possible
Smaller images are more secure by having less attack surface area, and also move faster in deployment pipelines.
Snyk has a great list of the 10 best practices for Node/Express containerization. Read those here.
One big carelessness we have left is running the application as root instead of using a user with lower privileges. Let's do a final fix to the Dockerfile:
FROM node:20
WORKDIR /usr/src/app
COPY . .
RUN npm ci
ENV DEBUG=playground:*
USER node
CMD npm startUsing Docker compose
In the previous section, we created an Express server, knowing that it will run in port 3123, and used the commands docker build -t express-server . && docker run -p 3123:3000 express-server to run it. This already looks like something you would need to put into a script to remember. Fortunately, Docker offers us a better solution.
Docker compose is another fantastic tool, which can help us to manage containers. Let's start using compose as we learn more about containers as it will help us save some time with the configuration.
Now we can turn the previous spell into a yaml file. The best part about yaml files is that you can save these to a Git repository!
Create the file docker-compose.yml and place it at the root of the project, next to the Dockerfile. This time we will use the same port for host and container. The file content is:
services:
  app:                    # The name of the service, can be anything
    image: express-server # Declares which image to use
    build: .              # Declares where to build if image is not found
    ports:                # Declares the ports to publish
      - 3000:3000
The meaning of each line is explained as a comment. If you want to see the full specification see the documentation.
Now we can use docker compose up to build and run the application. If we want to rebuild the images we can use docker compose up --build.
You can also run the application in the background with docker compose up -d (-d for detached) and close it with docker compose down.
Note that some older Docker versions (especially in Windows) do not support the command docker compose. One way to circumvent this problem is to install the stand alone command docker-compose that works mostly similarly to docker compose. However, the preferable fix is to update the Docker to a more recent version.
Creating files like docker-compose.yml that declare what you want instead of script files that you need to run in a specific order / a specific number of times is often a great practice.
Utilizing containers in development
When you are developing software, containerization can be used in various ways to improve your quality of life. One of the most useful cases is by bypassing the need to install and configure tools twice.
It may not be the best option to move your entire development environment into a container, but if that's what you want it's certainly possible. We will revisit this idea at the end of this part. But until then, run the Node application itself outside of containers.
The application we met in the previous exercises uses MongoDB. Let's explore Docker Hub to find a MongoDB image. Docker Hub is the default place where Docker pulls the images from, you can use other registries as well, but since we are already knee-deep in Docker it's a good choice. With a quick search, we can find https://hub.docker.com/_/mongo
Create a new yaml called todo-app/todo-backend/docker-compose.dev.yml that looks like following:
services:
  mongo:
    image: mongo
    ports:
      - 3456:27017
    environment:
      MONGO_INITDB_ROOT_USERNAME: root
      MONGO_INITDB_ROOT_PASSWORD: example
      MONGO_INITDB_DATABASE: the_database
The meaning of the two first environment variables defined above is explained on the Docker Hub page:
These variables, used in conjunction, create a new user and set that user's password. This user is created in the admin authentication database and given the role of root, which is a "superuser" role.
The last environment variable MONGO_INITDB_DATABASE will tell MongoDB to create a database with that name.
You can use -f flag to specify a file to run the Docker Compose command with e.g.
docker compose -f docker-compose.dev.yml upNow that we may have multiple compose files, it's useful.
Next, start the MongoDB with docker compose -f docker-compose.dev.yml up -d. With -d it will run it in the background. You can view the output logs with docker compose -f docker-compose.dev.yml logs -f. There the -f will ensure we follow the logs.
As said previously, currently we do not want to run the Node application inside a container. Developing while the application itself is inside a container is a challenge. We will explore that option later in this part.
Run the good old npm install first on your machine to set up the Node application. Then start the application with the relevant environment variable. You can modify the code to set them as the defaults or use the .env file. There is no hurt in putting these keys to GitHub since they are only used in your local development environment. I'll just throw them in with the npm run dev to help you copy-paste.
MONGO_URL=mongodb://localhost:3456/the_database npm run devThis won't be enough; we need to create a user to be authorized inside of the container. The url http://localhost:3000/todos leads to an authentication error:
[nodemon] 2.0.12
[nodemon] to restart at any time, enter `rs`
[nodemon] watching path(s): *.*
[nodemon] watching extensions: js,mjs,json
[nodemon] starting `node ./bin/www`
/Users/mluukkai/dev/fs-ci-lokakuu/repo/todo-app/todo-backend/node_modules/mongodb/lib/cmap/connection.js:272
          callback(new MongoError(document));
                   ^
MongoError: command find requires authentication
    at MessageStream.messageHandler (/Users/mluukkai/dev/fs-ci-lokakuu/repo/todo-app/todo-backend/node_modules/mongodb/lib/cmap/connection.js:272:20)
Bind mount and initializing the database
In the MongoDB Docker Hub page under "Initializing a fresh instance" is the info on how to execute JavaScript to initialize the database and a user for it.
The exercise project has a file todo-app/todo-backend/mongo/mongo-init.js with contents:
db.createUser({
  user: 'the_username',
  pwd: 'the_password',
  roles: [
    {
      role: 'dbOwner',
      db: 'the_database',
    },
  ],
});

db.createCollection('todos');

db.todos.insert({ text: 'Write code', done: true });
db.todos.insert({ text: 'Learn about containers', done: false });
This file will initialize the database with a user and a few todos. Next, we need to get it inside the container at startup.
We could create a new image FROM mongo and COPY the file inside, or we can use a bind mount to mount the file mongo-init.js to the container. Let's do the latter.
Bind mount is the act of binding a file (or directory) on the host machine to a file (or directory) in the container. A bind mount is done by adding a -v flag with container run. The syntax is -v FILE-IN-HOST:FILE-IN-CONTAINER. Since we already learned about Docker Compose let's skip that. The bind mount is declared under key volumes in docker-compose.dev.yml. Otherwise the format is the same, first host and then container:
  mongo:
    image: mongo
    ports:
     - 3456:27017
    environment:
      MONGO_INITDB_ROOT_USERNAME: root
      MONGO_INITDB_ROOT_PASSWORD: example
      MONGO_INITDB_DATABASE: the_database
    volumes:       - ./mongo/mongo-init.js:/docker-entrypoint-initdb.d/mongo-init.js
The result of the bind mount is that the file mongo-init.js in the mongo folder of the host machine is the same as the mongo-init.js file in the container's /docker-entrypoint-initdb.d directory. Changes to either file will be available in the other. We don't need to make any changes during runtime. But this will be the key to software development in containers.
Run docker compose -f docker-compose.dev.yml down --volumes to ensure that nothing is left and start from a clean slate with docker compose -f docker-compose.dev.yml up to initialize the database.
If you see an error like this:
mongo_database | failed to load: /docker-entrypoint-initdb.d/mongo-init.js
mongo_database | exiting with code -3
you may have a read permission problem. They are not uncommon when dealing with volumes. In the above case, you can use chmod a+r mongo-init.js, which will give everyone read access to that file. Be careful when using chmod since granting more privileges can be a security issue. Use the chmod only on the mongo-init.js on your computer.
Now starting the Express application with the correct environment variable should work:
MONGO_URL=mongodb://the_username:the_password@localhost:3456/the_database npm run devLet's check that the http://localhost:3000/todos returns the two todos we inserted in the initialization. We can and should use Postman to test the basic functionality of the app, such as adding or deleting a todo.
Still problems?
For some reason, the initialization of Mongo has caused problems for many.
If the app does not work and you still end up with the following error:
/Users/mluukkai/dev/fs-ci-lokakuu/repo/todo-app/todo-backend/node_modules/mongodb/lib/cmap/connection.js:272
          callback(new MongoError(document));
                   ^
MongoError: command find requires authentication
    at MessageStream.messageHandler (/Users/mluukkai/dev/fs-ci-lokakuu/repo/todo-app/todo-backend/node_modules/mongodb/lib/cmap/connection.js:272:20)
run these commands:
docker compose -f docker-compose.dev.yml down --volumes
docker image rm mongo
After these, try to start Mongo again.
If the problem persists, let us drop the idea of a volume altogether and copy the initialization script to a custom image. Create the following Dockerfile to the directory todo-app/todo-backend/mongo:
FROM mongo

COPY ./mongo-init.js /docker-entrypoint-initdb.d/
Build it to an image with the command:
docker build -t initialized-mongo .Now change the docker-compose.dev.yml file to use the new image:
  mongo:
    image: initialized-mongo    ports:
     - 3456:27017
    environment:
      MONGO_INITDB_ROOT_USERNAME: root
      MONGO_INITDB_ROOT_PASSWORD: example
      MONGO_INITDB_DATABASE: the_database
Now the app should finally work.
Persisting data with volumes
By default, database containers are not going to preserve our data. When you close the database container you may or may not be able to get the data back.
Mongo is actually a rare case in which the container indeed does preserve the data. This happens, since the developers who made the Docker image for Mongo have defined a volume to be used. This line in the Dockerfile will instruct Docker to preserve the data in a volume.
There are two distinct methods to store the data:
- Declaring a location in your filesystem (called bind mount)
- Letting Docker decide where to store the data (volume)
The first choice is preferable in most cases whenever one really needs to avoid the data being deleted.
Let's see both in action with Docker compose. Let us start with bind mount:
services:
  mongo:
    image: mongo
    ports:
     - 3456:27017
    environment:
      MONGO_INITDB_ROOT_USERNAME: root
      MONGO_INITDB_ROOT_PASSWORD: example
      MONGO_INITDB_DATABASE: the_database
    volumes:
      - ./mongo/mongo-init.js:/docker-entrypoint-initdb.d/mongo-init.js
      - ./mongo_data:/data/db
The above will create a directory called mongo_data to your local filesystem and map it into the container as /data/db. This means the data in /data/db is stored outside of the container but still accessible by the container! Just remember to add the directory to .gitignore.
A similar outcome can be achieved with a named volume:
services:
  mongo:
    image: mongo
    ports:
     - 3456:27017
    environment:
      MONGO_INITDB_ROOT_USERNAME: root
      MONGO_INITDB_ROOT_PASSWORD: example
      MONGO_INITDB_DATABASE: the_database
    volumes:
      - ./mongo/mongo-init.js:/docker-entrypoint-initdb.d/mongo-init.js
      - mongo_data:/data/db
volumes:  mongo_data:
Now the volume is created and managed by Docker. After starting the application (docker compose -f docker-compose.dev.yml up) you can list the volumes with docker volume ls, inspect one of them with docker volume inspect and even delete them with docker volume rm:
$ docker volume ls
DRIVER    VOLUME NAME
local     todo-backend_mongo_data
$ docker volume inspect todo-backend_mongo_data
[
    {
        "CreatedAt": "2024-19-03T12:52:11Z",
        "Driver": "local",
        "Labels": {
            "com.docker.compose.project": "todo-backend",
            "com.docker.compose.version": "1.29.2",
            "com.docker.compose.volume": "mongo_data"
        },
        "Mountpoint": "/var/lib/docker/volumes/todo-backend_mongo_data/_data",
        "Name": "todo-backend_mongo_data",
        "Options": null,
        "Scope": "local"
    }
]
The named volume is still stored in your local filesystem but figuring out where may not be as trivial as with the previous option.
Debugging issues in containers
When coding, you most likely end up in a situation where everything is broken.
- Matti Luukkainen
When developing with containers, we need to learn new tools for debugging, since we can not just "console.log" everything. When code has a bug, you may often be in a state where at least something works, so you can work forward from that. Configuration most often is in either of two states: 1. working or 2. broken. We will go over a few tools that can help when your application is in the latter state.
When developing software, you can safely progress step by step, all the time verifying that what you have coded behaves as expected. Often, this is not the case when doing configurations. The configuration you may be writing can be broken until the moment it is finished. So when you write a long docker-compose.yml or Dockerfile and it does not work, you need to take a moment and think about the various ways you could confirm something is working.
Question Everything is still applicable here. As said in part 3: The key is to be systematic. Since the problem can exist anywhere, you must question everything, and eliminate all possible sources of error one by one.
For myself, the most valuable method of debugging is stopping and thinking about what I'm trying to accomplish instead of just bashing my head at the problem. Often there is a simple, alternate, solution or quick google search that will get me moving forward.
exec
The Docker command exec is a heavy hitter. It can be used to jump right into a container when it's running.
Let's start a web server in the background and do a little bit of debugging to get it running and displaying the message "Hello, exec!" in our browser. Let's choose Nginx which is, among other things, a server capable of serving static HTML files. It has a default index.html that we can replace.
$ docker container run -d nginxOk, now the questions are:
- Where should we go with our browser?
- Is it even running?
We know how to answer the latter: by listing the running containers.
$ docker container ls
CONTAINER ID   IMAGE   COMMAND  CREATED     STATUS    PORTS     NAMES
3f831a57b7cc   nginx   ...      3 sec ago   Up 2 sec  80/tcp    keen_darwin
Yes! We got the first question answered as well. It seems to listen on port 80, as seen on the output above.
Let's shut it down and restart with the -p flag to have our browser access it.
$ docker container stop keen_darwin
$ docker container rm keen_darwin

$ docker container run -d -p 8080:80 nginx
Editor's note_ when doing development, it is essential to constantly follow the container logs. I'm usually not running containers in a detached mode (that is with -d) since it requires a bit of an extra effort to open the logs.
When I'm 100% sure that everything works... no, when I'm 200% sure, then I might relax a bit and start the containers in detached mode. Until everything again falls apart and it is time to open the logs again.
Let's look at the app by going to http://localhost:8080. It seems that it is showing the wrong message! Let's hop right into the container and fix this. Keep your browser open, we won't need to shut down the container for this fix. We will execute bash inside the container, the flags -it will ensure that we can interact with the container:
$ docker container ls
CONTAINER ID   IMAGE     COMMAND  PORTS                  NAMES
7edcb36aff08   nginx     ...      0.0.0.0:8080->80/tcp   wonderful_ramanujan

$ docker exec -it wonderful_ramanujan bash
root@7edcb36aff08:/#
Now that we are in, we need to find the faulty file and replace it. Quick Google tells us that file itself is /usr/share/nginx/html/index.html.
Let's move to the directory and delete the file
root@7edcb36aff08:/# cd /usr/share/nginx/html/
root@7edcb36aff08:/# rm index.html
Now, if we go to http://localhost:8080/ we know that we deleted the correct file. The page shows 404. Let's replace it with one containing the correct contents:
root@7edcb36aff08:/# echo "Hello, exec!" > index.htmlRefresh the page, and our message is displayed! Now we know how exec can be used to interact with the containers. Remember that all of the changes are lost when the container is deleted. To preserve the changes, you must use commit just as we did in previous section.
Redis
Redis is a key-value database. In contrast to eg. MongoDB, the data stored in key-value storage has a bit less structure, there are eg. no collections or tables, it just contains junks of data that can be fetched based on the key that was attached to the data (the value).
By default, Redis works in-memory, which means that it does not store data persistently.
An excellent use case for Redis is to use it as a cache. Caches are often used to store data that is otherwise slow to fetch and save until it's no longer valid. After the cache becomes invalid, you would then fetch the data again and store it in the cache.
Redis has nothing to do with containers. But since we are already able to add any 3rd party service to your applications, why not learn about a new one?
Exercises 12.9. - 12.11.
Exercise 12.9: Set up Redis for the project
The Express server has already been configured to use Redis, and it is only missing the REDIS_URL environment variable. The application will use that environment variable to connect to the Redis. Read through the Docker Hub page for Redis, add Redis to the todo-app/todo-backend/docker-compose.dev.yml by defining another service after mongo:
services:
  mongo:
    ...
  redis:
    ???
Since the Docker Hub page doesn't have all the info, we can use Google to aid us. The default port for Redis is found by doing so:
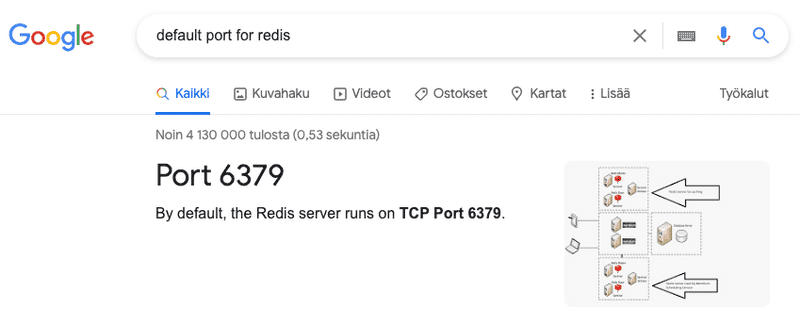
We won't have any idea if the configuration works unless we try it. The application will not start using Redis by itself, that shall happen in the next exercise.
Once Redis is configured and started, restart the backend and give it the REDIS_URL, which has the form redis://host:port
REDIS_URL=insert-redis-url-here MONGO_URL=mongodb://the_username:the_password@localhost:3456/the_database npm run devYou can now test the configuration by adding the line
const redis = require('../redis')to the Express server e.g. in the file routes/index.js. If nothing happens, the configuration is done right. If not, the server crashes:
events.js:291
      throw er; // Unhandled 'error' event
      ^

Error: Redis connection to localhost:637 failed - connect ECONNREFUSED 127.0.0.1:6379
    at TCPConnectWrap.afterConnect [as oncomplete] (net.js:1144:16)
Emitted 'error' event on RedisClient instance at:
    at RedisClient.on_error (/Users/mluukkai/opetus/docker-fs/container-app/express-app/node_modules/redis/index.js:342:14)
    at Socket.<anonymous> (/Users/mluukkai/opetus/docker-fs/container-app/express-app/node_modules/redis/index.js:223:14)
    at Socket.emit (events.js:314:20)
    at emitErrorNT (internal/streams/destroy.js:100:8)
    at emitErrorCloseNT (internal/streams/destroy.js:68:3)
    at processTicksAndRejections (internal/process/task_queues.js:80:21) {
  errno: -61,
  code: 'ECONNREFUSED',
  syscall: 'connect',
  address: '127.0.0.1',
  port: 6379
}
[nodemon] app crashed - waiting for file changes before starting...
Exercise 12.10:
The project already has https://www.npmjs.com/package/redis installed and two functions "promisified" - getAsync and setAsync.
- setAsync function takes in key and value, using the key to store the value.
- getAsync function takes in a key and returns the value in a promise.
Implement a todo counter that saves the number of created todos to Redis:
- Step 1: Whenever a request is sent to add a todo, increment the counter by one.
- Step 2: Create a GET /statistics endpoint where you can ask for the usage metadata. The format should be the following JSON:
{
  "added_todos": 0
}
Exercise 12.11:
Use script to record what you do, save the file as script-answers/exercise12_11.txt
If the application does not behave as expected, direct access to the database may be beneficial in pinpointing problems. Let us try out how redis-cli can be used to access the database.
- Go to the Redis container with docker exec and open the redis-cli.
- Find the key you used with KEYS *
- Check the value of the key with the command GET
- Set the value of the counter to 9001, find the right command from here
- Make sure that the new value works by refreshing the page http://localhost:3000/statistics
- Create a new todo with Postman and ensure from redis-cli that the counter has increased accordingly
- Delete the key from the cli and ensure that the counter works when new todos are added
Persisting data with Redis
In the previous section, it was mentioned that by default Redis does not persist the data. However, the persistence is easy to toggle on. We only need to start the Redis with a different command, as instructed by the Docker hub page:
services:
  redis:
    # Everything else
    command: ['redis-server', '--appendonly', 'yes'] # Overwrite the CMD
    volumes: # Declare the volume
      - ./redis_data:/data
The data will now be persisted to the directory redis_data of the host machine. Remember to add the directory to .gitignore!
Other functionality of Redis
In addition to the GET, SET and DEL operations on keys and values, Redis can do also quite a lot more. It can for example automatically expire keys, which is a very useful feature when Redis is used as a cache.
Redis can also be used to implement the so-called publish-subscribe (or PubSub) pattern which is an asynchronous communication mechanism for distributed software. In this scenario, Redis works as a message broker between two or more services. Some of the services are publishing messages by sending those to Redis, which on arrival of a message, informs the parties that have subscribed to those messages.