a
Rendering a collection, modules
Before starting a new part, let's recap some of the topics that proved difficult last year.
console.log
What's the difference between an experienced JavaScript programmer and a rookie? The experienced one uses console.log 10-100 times more.
Paradoxically, this seems to be true even though a rookie programmer would need console.log (or any debugging method) more than an experienced one.
When something does not work, don't just guess what's wrong. Instead, log or use some other way of debugging.
NB As explained in part 1, when you use the command console.log for debugging, don't concatenate things 'the Java way' with a plus. Instead of writing:
console.log('props value is ' + props)separate the things to be printed with a comma:
console.log('props value is', props)If you concatenate an object with a string and log it to the console (like in our first example), the result will be pretty useless:
props value is [object Object]On the contrary, when you pass objects as distinct arguments separated by commas to console.log, like in our second example above, the content of the object is printed to the developer console as strings that are insightful. If necessary, read more about debugging React applications.
Protip: Visual Studio Code snippets
With Visual Studio Code it's easy to create 'snippets', i.e., shortcuts for quickly generating commonly re-used portions of code, much like how 'sout' works in Netbeans.
Instructions for creating snippets can be found here.
Useful, ready-made snippets can also be found as VS Code plugins, in the marketplace.
The most important snippet is the one for the console.log() command, for example, clog. This can be created like so:
{
  "console.log": {
    "prefix": "clog",
    "body": [
      "console.log('$1')",
    ],
    "description": "Log output to console"
  }
}
Debugging your code using console.log() is so common that Visual Studio Code has that snippet built in. To use it, type log and hit Tab to autocomplete. More fully featured console.log() snippet extensions can be found in the marketplace.
JavaScript Arrays
From here on out, we will be using the functional programming operators of the JavaScript array, such as find, filter, and map - all of the time.
If operating arrays with functional operators feels foreign to you, it is worth watching at least the first three parts of the YouTube video series Functional Programming in JavaScript:
Event Handlers Revisited
Based on last year's course, event handling has proved to be difficult.
It's worth reading the revision chapter at the end of the previous part - event handlers revisited - if it feels like your own knowledge on the topic needs some brushing up.
Passing event handlers to the child components of the App component has raised some questions. A small revision on the topic can be found here.
Rendering Collections
Now, we will build the frontend, or the user interface (the part users see in their browser), using React, similar to the example application from part 0.
Let's start with the following (the file App.jsx):
const App = (props) => {
  const { notes } = props

  return (
    <div>
      <h1>Notes</h1>
      <ul>
        <li>{notes[0].content}</li>
        <li>{notes[1].content}</li>
        <li>{notes[2].content}</li>
      </ul>
    </div>
  )
}

export default App
The file main.jsx looks like this:
import ReactDOM from 'react-dom/client'
import App from './App'

const notes = [
  {
    id: 1,
    content: 'HTML is easy',
    important: true
  },
  {
    id: 2,
    content: 'Browser can execute only JavaScript',
    important: false
  },
  {
    id: 3,
    content: 'GET and POST are the most important methods of HTTP protocol',
    important: true
  }
]

ReactDOM.createRoot(document.getElementById('root')).render(
  <App notes={notes} />
)
Every note contains its textual content, a boolean value for marking whether the note has been categorized as important or not, and also a unique id.
The example above works due to the fact that there are exactly three notes in the array.
A single note is rendered by accessing the objects in the array by referring to a hard-coded index number:
<li>{notes[1].content}</li>This is, of course, not practical. We can improve on this by generating React elements from the array objects using the map function.
notes.map(note => <li>{note.content}</li>)The result is an array of li elements.
[
  <li>HTML is easy</li>,
  <li>Browser can execute only JavaScript</li>,
  <li>GET and POST are the most important methods of HTTP protocol</li>,
]
Which can then be placed inside ul tags:
const App = (props) => {
  const { notes } = props

  return (
    <div>
      <h1>Notes</h1>
      <ul>        {notes.map(note => <li>{note.content}</li>)}      </ul>    </div>
  )
}
Because the code generating the li tags is JavaScript, it must be wrapped in curly braces in a JSX template just like all other JavaScript code.
We will also make the code more readable by separating the arrow function's declaration across multiple lines:
const App = (props) => {
  const { notes } = props

  return (
    <div>
      <h1>Notes</h1>
      <ul>
        {notes.map(note =>
          <li>            {note.content}          </li>        )}
      </ul>
    </div>
  )
}
Key-attribute
Even though the application seems to be working, there is a nasty warning in the console:

As the linked React page in the error message suggests; the list items, i.e. the elements generated by the map method, must each have a unique key value: an attribute called key.
Let's add the keys:
const App = (props) => {
  const { notes } = props

  return (
    <div>
      <h1>Notes</h1>
      <ul>
        {notes.map(note =>
          <li key={note.id}>            {note.content}
          </li>
        )}
      </ul>
    </div>
  )
}
And the error message disappears.
React uses the key attributes of objects in an array to determine how to update the view generated by a component when the component is re-rendered. More about this is in the React documentation.
Map
Understanding how the array method map works is crucial for the rest of the course.
The application contains an array called notes:
const notes = [
  {
    id: 1,
    content: 'HTML is easy',
    important: true
  },
  {
    id: 2,
    content: 'Browser can execute only JavaScript',
    important: false
  },
  {
    id: 3,
    content: 'GET and POST are the most important methods of HTTP protocol',
    important: true
  }
]
Let's pause for a moment and examine how map works.
If the following code is added to, let's say, the end of the file:
const result = notes.map(note => note.id)
console.log(result)
[1, 2, 3] will be printed to the console. map always creates a new array, the elements of which have been created from the elements of the original array by mapping: using the function given as a parameter to the map method.
The function is
note => note.idWhich is an arrow function written in compact form. The full form would be:
(note) => {
  return note.id
}
The function gets a note object as a parameter and returns the value of its id field.
Changing the command to:
const result = notes.map(note => note.content)will give you an array containing the contents of the notes.
This is already pretty close to the React code we used:
notes.map(note =>
  <li key={note.id}>
    {note.content}
  </li>
)
which generates an li tag containing the contents of the note from each note object.
Because the function parameter passed to the map method -
note => <li key={note.id}>{note.content}</li>- is used to create view elements, the value of the variable must be rendered inside curly braces. Try to see what happens if the braces are removed.
The use of curly braces will cause some pain in the beginning, but you will get used to them soon enough. The visual feedback from React is immediate.
Anti-pattern: Array Indexes as Keys
We could have made the error message on our console disappear by using the array indexes as keys. The indexes can be retrieved by passing a second parameter to the callback function of the map method:
notes.map((note, i) => ...)When called like this, i is assigned the value of the index of the position in the array where the note resides.
As such, one way to define the row generation without getting errors is:
<ul>
  {notes.map((note, i) =>
    <li key={i}>
      {note.content}
    </li>
  )}
</ul>
This is, however, not recommended and can create undesired problems even if it seems to be working just fine.
Read more about this in this article.
Refactoring Modules
Let's tidy the code up a bit. We are only interested in the field notes of the props, so let's retrieve that directly using destructuring:
const App = ({ notes }) => {  return (
    <div>
      <h1>Notes</h1>
      <ul>
        {notes.map(note =>
          <li key={note.id}>
            {note.content}
          </li>
        )}
      </ul>
    </div>
  )
}
If you have forgotten what destructuring means and how it works, please review the section on destructuring.
We'll separate displaying a single note into its own component Note:
const Note = ({ note }) => {  return (    <li>{note.content}</li>  )}
const App = ({ notes }) => {
  return (
    <div>
      <h1>Notes</h1>
      <ul>
        {notes.map(note =>           <Note key={note.id} note={note} />        )}      </ul>
    </div>
  )
}
Note that the key attribute must now be defined for the Note components, and not for the li tags like before.
A whole React application can be written in a single file. Although that is, of course, not very practical. Common practice is to declare each component in its own file as an ES6-module.
We have been using modules the whole time. The first few lines of the file main.jsx:
import ReactDOM from "react-dom/client"
import App from "./App"
import two modules, enabling them to be used in that file. The module react-dom/client is placed into the variable ReactDOM, and the module that defines the main component of the app is placed into the variable App
Let's move our Note component into its own module.
In smaller applications, components are usually placed in a directory called components within the src directory. The convention is to name the file after the component. A possible directory structure for a project containing multiple components could be as follows:
src/
├── main.jsx
├── App.jsx
└── components/           # Folder for reusable components
    ├── Footer.jsx        # File named after the component
    ├── Note.jsx
    └── Notification.jsx
Now, we'll create a directory called components for our application and place a file named Note.jsx inside. The contents of the file are as follows:
const Note = ({ note }) => {
  return <li>{note.content}</li>
}

export default Note
The last line of the module exports the declared module, the variable Note.
Now the file that is using the component - App.jsx - can import the module:
import Note from './components/Note'
const App = ({ notes }) => {
  // ...
}
The component exported by the module is now available for use in the variable Note, just as it was earlier.
Note that when importing our own components, their location must be given in relation to the importing file:
'./components/Note'The period - . - in the beginning refers to the current directory, so the module's location is a file called Note.jsx in the components sub-directory of the current directory. The filename extension .jsx can be omitted.
Modules have plenty of other uses other than enabling component declarations to be separated into their own files. We will get back to them later in this course.
The current code of the application can be found on GitHub.
Note that the main branch of the repository contains the code for a later version of the application. The current code is in the branch part2-1:
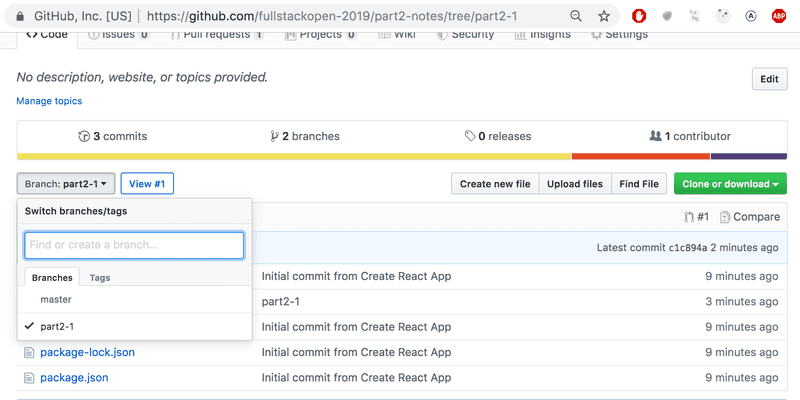
If you clone the project, run the command npm install before starting the application with npm run dev.
When the Application Breaks
Early in your programming career (and even after 30 years of coding like yours truly), what often happens is that the application just completely breaks down. This is even more so the case with dynamically typed languages, such as JavaScript, where the compiler does not check the data type. For instance, function variables or return values.
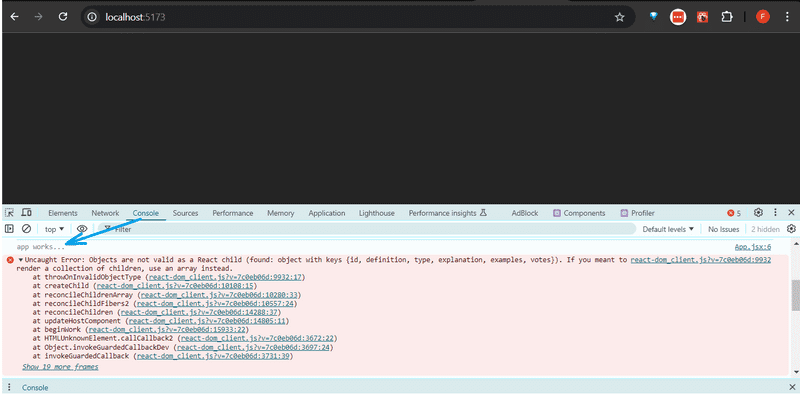
A "React explosion" can, for example, look like this:

In these situations, your best way out is the console.log method.
The piece of code causing the explosion is this:
const Course = ({ course }) => (
  <div>
    <Header course={course} />
  </div>
)

const App = () => {
  const course = {
    // ...
  }

  return (
    <div>
      <Course course={course} />
    </div>
  )
}
We'll hone in on the reason for the breakdown by adding console.log commands to the code. Because the first thing to be rendered is the App component, it's worth putting the first console.log there:
const App = () => {
  const course = {
    // ...
  }

  console.log('App works...')
  return (
    // ..
  )
}
To see the printing in the console, we must scroll up over the long red wall of errors.
When one thing is found to be working, it's time to log deeper. If the component has been declared as a single statement or a function without a return, it makes printing to the console harder.
const Course = ({ course }) => (
  <div>
    <Header course={course} />
  </div>
)
The component should be changed to its longer form for us to add the printing:
const Course = ({ course }) => {
  console.log(course)  return (
    <div>
      <Header course={course} />
    </div>
  )
}
Quite often the root of the problem is that the props are expected to be of a different type, or called with a different name than they actually have, and destructuring fails as a result. The problem often begins to solve itself when destructuring is removed and we see what the props contain.
const Course = (props) => {  console.log(props)  const { course } = props
  return (
    <div>
      <Header course={course} />
    </div>
  )
}
If the problem has still not been resolved, sadly there isn't much to do apart from continuing to bug-hunt by sprinkling more console.log statements around your code.
I added this chapter to the material after the model answer for the next question exploded completely (due to props being of the wrong type), and I had to debug it using console.log.
Web developer's oath
Before the exercises, let me remind what you promised at the end of the previous part.
Programming is hard, that is why I will use all the possible means to make it easier
- I will have my browser developer console open all the time
- I progress with small steps
- I will write lots of console.log statements to make sure I understand how the code behaves and to help pinpoint problems
- If my code does not work, I will not write more code. Instead, I start deleting the code until it works or just return to a state when everything was still working
- When I ask for help in the course Discord channel or elsewhere I formulate my questions properly, see here how to ask for help
Exercises 2.1.-2.5.
The exercises are submitted via GitHub, and by marking the exercises as done in the submission system.
You can submit all of the exercises into the same repository, or use multiple different repositories. If you submit exercises from different parts into the same repository, name your directories well.
The exercises are submitted One part at a time. When you have submitted the exercises for a part, you can no longer submit any missed exercises for that part.
Note that this part has more exercises than the ones before, so do not submit until you have done all the exercises from this part you want to submit.
2.1: Course information step 6
Let's finish the code for rendering course contents from exercises 1.1 - 1.5. You can start with the code from the model answers. The model answers for part 1 can be found by going to the submission system, clicking on my submissions at the top, and in the row corresponding to part 1 under the solutions column clicking on show. To see the solution to the course info exercise, click on App.jsx under courseinfo.
Note that if you copy a project from one place to another, you might have to delete the node_modules directory and install the dependencies again with the command npm install before you can start the application.
Generally, it's not recommended that you copy a project's whole contents and/or add the node_modules directory to the version control system.
Let's change the App component like so:
const App = () => {
  const course = {
    id: 1,
    name: 'Half Stack application development',
    parts: [
      {
        name: 'Fundamentals of React',
        exercises: 10,
        id: 1
      },
      {
        name: 'Using props to pass data',
        exercises: 7,
        id: 2
      },
      {
        name: 'State of a component',
        exercises: 14,
        id: 3
      }
    ]
  }

  return <Course course={course} />
}

export default App
Define a component responsible for formatting a single course called Course.
The component structure of the application can be, for example, the following:
App
  Course
    Header
    Content
      Part
      Part
      ...
Hence, the Course component contains the components defined in the previous part, which are responsible for rendering the course name and its parts.
The rendered page can, for example, look as follows:
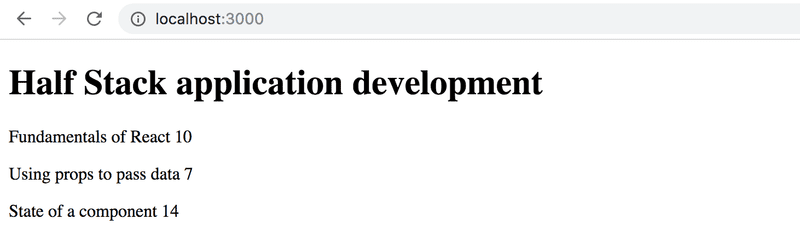
You don't need the sum of the exercises yet.
The application must work regardless of the number of parts a course has, so make sure the application works if you add or remove parts of a course.
Ensure that the console shows no errors!
2.2: Course information step 7
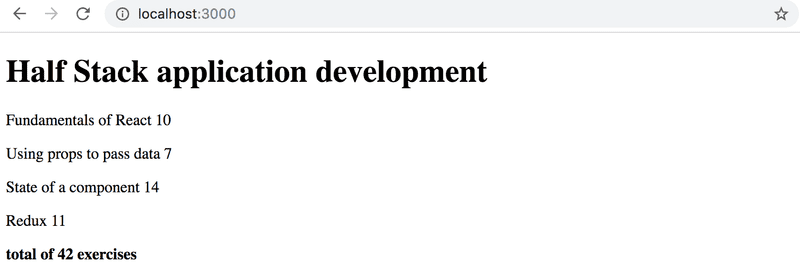
Show also the sum of the exercises of the course.
2.3*: Course information step 8
If you haven't done so already, calculate the sum of exercises with the array method reduce.
Pro tip: when your code looks as follows:
const total =
  parts.reduce((s, p) => someMagicHere)
and does not work, it's worth it to use console.log, which requires the arrow function to be written in its longer form:
const total = parts.reduce((s, p) => {
  console.log('what is happening', s, p)
  return someMagicHere
})
Not working? : Use your search engine to look up how reduce is used in an Object Array.
2.4: Course information step 9
Let's extend our application to allow for an arbitrary number of courses:
const App = () => {
  const courses = [
    {
      name: 'Half Stack application development',
      id: 1,
      parts: [
        {
          name: 'Fundamentals of React',
          exercises: 10,
          id: 1
        },
        {
          name: 'Using props to pass data',
          exercises: 7,
          id: 2
        },
        {
          name: 'State of a component',
          exercises: 14,
          id: 3
        },
        {
          name: 'Redux',
          exercises: 11,
          id: 4
        }
      ]
    },
    {
      name: 'Node.js',
      id: 2,
      parts: [
        {
          name: 'Routing',
          exercises: 3,
          id: 1
        },
        {
          name: 'Middlewares',
          exercises: 7,
          id: 2
        }
      ]
    }
  ]

  return (
    <div>
      // ...
    </div>
  )
}
The application can, for example, look like this:
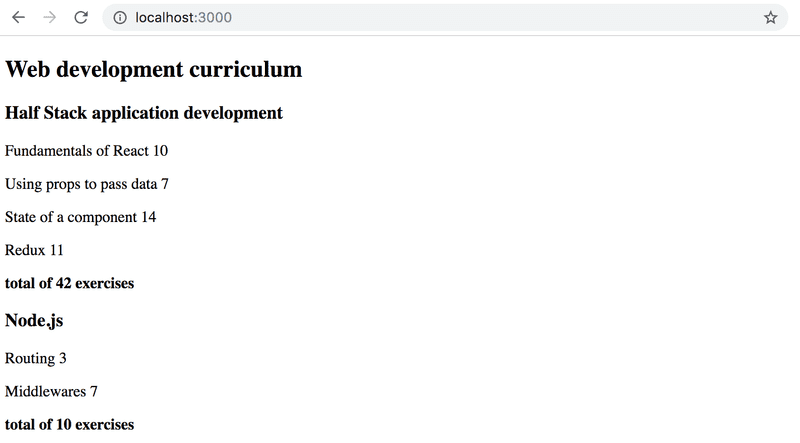
2.5: Separate module step 10
Declare the Course component as a separate module, which is imported by the App component. You can include all subcomponents of the course in the same module.