c
在Redux应用中与后端通信
让我们扩展应用,使笔记被存储到后端。我们将使用json-server,这在第二章节中已经很熟悉。
数据库的初始状态被存储在文件db.json中,它被放置在项目的根部。
{
  "notes": [
    {
      "content": "the app state is in redux store",
      "important": true,
      "id": 1
    },
    {
      "content": "state changes are made with actions",
      "important": false,
      "id": 2
    }
  ]
}
我们将为项目安装json-server...
npm install json-server --save-dev然后在文件package.json的scripts部分添加以下一行
"scripts": {
  "server": "json-server -p3001 --watch db.json",
  // ...
}现在让我们用命令npm run server来启动json-server。
接下来我们将在文件services/notes.js中创建一个方法,使用axios从后端获取数据。
import axios from 'axios'

const baseUrl = 'http://localhost:3001/notes'

const getAll = async () => {
  const response = await axios.get(baseUrl)
  return response.data
}

export default { getAll }
我们将axios添加到项目中
npm install axios我们将改变noteReducer中状态的初始化,这样默认情况下就没有笔记了。
const noteSlice = createSlice({
  name: 'notes',
  initialState: [],  // ...
})我们还要添加一个新的动作appendNote来添加一个笔记对象。
const noteSlice = createSlice({
  name: 'notes',
  initialState,
  reducers: {
    createNote(state, action) {
      const content = action.payload

      state.push({
        content,
        important: false,
        id: generateId(),
      })
    },
    toggleImportanceOf(state, action) {
      const id = action.payload

      const noteToChange = state.find(n => n.id === id)

      const changedNote = {
        ...noteToChange,
        important: !noteToChange.important
      }

      return state.map(note =>
        note.id !== id ? note : changedNote
      )
    },
    appendNote(state, action) {      state.push(action.payload)    }  },
})

export const { createNote, toggleImportanceOf, appendNote } = noteSlice.actions
export default noteSlice.reducer基于从服务器收到的数据初始化笔记状态的快速方法是在index.js文件中获取笔记,并使用appendNote动作创建器为每个单独的笔记对象分派一个动作。
// ...
import noteService from './services/notes'import noteReducer, { appendNote } from './reducers/noteReducer'
const store = configureStore({
  reducer: {
    notes: noteReducer,
    filter: filterReducer,
  }
})

noteService.getAll().then(notes =>  notes.forEach(note => {    store.dispatch(appendNote(note))  }))
// ...派遣多个动作似乎有点不切实际。让我们添加一个动作创建器setNotes,可以用来直接替换笔记数组。我们将通过实现setNotes动作,从createSlice函数中获得动作创建器。
// ...

const noteSlice = createSlice({
  name: 'notes',
  initialState,
  reducers: {
    createNote(state, action) {
      const content = action.payload

      state.push({
        content,
        important: false,
        id: generateId(),
      })
    },
    toggleImportanceOf(state, action) {
      const id = action.payload

      const noteToChange = state.find(n => n.id === id)

      const changedNote = {
        ...noteToChange,
        important: !noteToChange.important
      }

      return state.map(note =>
        note.id !== id ? note : changedNote
      )
    },
    appendNote(state, action) {
      state.push(action.payload)
    },
    setNotes(state, action) {      return action.payload    }  },
})

export const { createNote, toggleImportanceOf, appendNote, setNotes } = noteSlice.actions
export default noteSlice.reducer现在,index.js文件中的代码看起来好多了。
// ...
import noteService from './services/notes'
import noteReducer, { setNotes } from './reducers/noteReducer'
const store = configureStore({
  reducer: {
    notes: noteReducer,
    filter: filterReducer,
  }
})

noteService.getAll().then(notes =>
store.dispatch(setNotes(notes)))NB:我们为什么不用await来代替 promise 和事件处理程序(注册到then-methods)?
等待只在async函数中起作用,而index.js中的代码不在函数中,所以由于操作的简单性,我们这次就不使用async了。
然而,我们决定将笔记的初始化移到App组件中,并且,像往常一样,当从服务器获取数据时,我们将使用effect hook。
import { useEffect } from 'react'import NewNote from './components/NewNote'
import Notes from './components/Notes'
import VisibilityFilter from './components/VisibilityFilter'
import noteService from './services/notes'import { setNotes } from './reducers/noteReducer'import { useDispatch } from 'react-redux'
const App = () => {
  const dispatch = useDispatch()  useEffect(() => {    noteService      .getAll().then(notes => dispatch(setNotes(notes)))  }, [])
  return (
    <div>
      <NewNote />
      <VisibilityFilter />
      <Notes />
    </div>
  )
}

export default App
使用useEffect钩子会导致一个eslint警告。
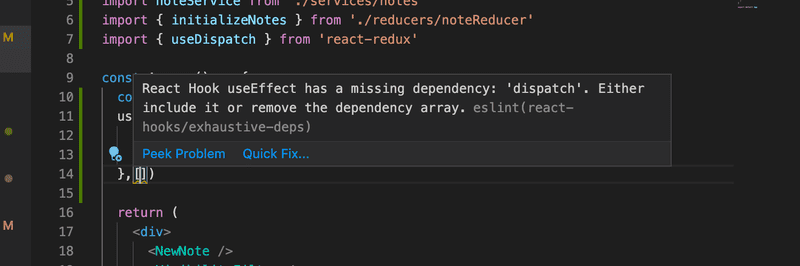
我们可以通过下面的操作摆脱它。
const App = () => {
  const dispatch = useDispatch()
  useEffect(() => {
    noteService
      .getAll().then(notes => dispatch(setNotes(notes)))
  }, [dispatch])
  // ...
}现在我们在App组件中定义的变量dispatch,实际上是redux-store的调度函数,已经被添加到useEffect的数组中作为参数接收。
如果调度变量的值在运行时发生变化。
该效果将被再次执行。然而这不会发生在我们的应用中,所以这个警告是不必要的。
摆脱警告的另一个方法是在这一行禁用eslint。
const App = () => {
  const dispatch = useDispatch()
  useEffect(() => {
    noteService
      .getAll().then(notes => dispatch(setNotes(notes)))
  },[]) // eslint-disable-line react-hooks/exhaustive-deps
  // ...
}一般来说,当eslint抛出一个警告时禁用它并不是一个好主意。尽管有关的eslint规则引起了一些争论,我们将使用第一个解决方案。
更多关于需要定义钩子的依赖关系,请看 React文档。
当涉及到创建一个新的笔记时,我们可以做同样的事情。让我们扩展一下与服务器通信的代码,如下。
const baseUrl = 'http://localhost:3001/notes'

const getAll = async () => {
  const response = await axios.get(baseUrl)
  return response.data
}

const createNew = async (content) => {  const object = { content, important: false }  const response = await axios.post(baseUrl, object)  return response.data}
export default {
  getAll,
  createNew,
}组件NewNote的addNote方法略有变化。
import { useDispatch } from 'react-redux'
import { createNote } from '../reducers/noteReducer'
import noteService from '../services/notes'
const NewNote = (props) => {
  const dispatch = useDispatch()

  const addNote = async (event) => {    event.preventDefault()
    const content = event.target.note.value
    event.target.note.value = ''
    const newNote = await noteService.createNew(content)    dispatch(createNote(newNote))  }

  return (
    <form onSubmit={addNote}>
      <input name="note" />
      <button type="submit">add</button>
    </form>
  )
}

export default NewNote因为后端为笔记生成了ID,我们将相应地改变动作创建者createNote。
createNote(state, action) {
  state.push(action.payload)
}
改变笔记的重要性可以用同样的原则来实现,通过对服务器进行异步方法调用,然后分派一个适当的动作。
该应用的代码的当前状态可以在GitHub的分支part6-3中找到。
Asynchronous actions and redux thunk
我们的方法很好,但与服务器的通信发生在组件的功能中,这不是很好。如果能将通信从组件中抽象出来就更好了,这样它们就不必做任何其他事情,只需调用相应的动作创建器。举个例子,App将初始化应用的状态,如下所示。
const App = () => {
  const dispatch = useDispatch()

  useEffect(() => {
    dispatch(initializeNotes())
  },[dispatch])

  // ...
}而NewNote将创建一个新的笔记,如下所示。
const NewNote = () => {
  const dispatch = useDispatch()

  const addNote = async (event) => {
    event.preventDefault()
    const content = event.target.note.value
    event.target.note.value = ''
    dispatch(createNote(content))
  }

  // ...
}在这个实现中,两个组件都会派发一个动作,而不需要知道幕后发生的服务器之间的通信。这类async动作可以使用Redux Thunk库来实现。当使用Redux工具包的configureStore函数创建Redux商店时,使用该库不需要任何额外配置。
现在让我们安装该库
npm install redux-thunk通过Redux Thunk可以实现action creators,它返回一个函数而不是一个对象。该函数接收Redux存储的dispatch和getState方法作为参数。这允许异步动作创建者的实现,它首先等待某个异步操作的完成,然后分派一些动作,改变商店的状态。
我们可以定义一个动作创建器initializeNotes,根据从服务器收到的数据初始化笔记。
// ...
import noteService from '../services/notes'
const noteSlice = createSlice(/* ... */)

export const { createNote, toggleImportanceOf, setNotes, appendNote } = noteSlice.actions

export const initializeNotes = () => {  return async dispatch => {    const notes = await noteService.getAll()    dispatch(setNotes(notes))  }}
export default noteSlice.reducer在内部函数中,指的是异步操作,该操作首先从服务器获取所有笔记,然后分派setNotes操作,将它们添加到存储中。
组件App现在可以被定义如下。
const App = () => {
  const dispatch = useDispatch()

  useEffect(() => {    dispatch(initializeNotes())  },[dispatch])
  return (
    <div>
      <NewNote />
      <VisibilityFilter />
      <Notes />
    </div>
  )
}
这个解决方案很优雅。笔记的初始化逻辑已经完全从React组件中分离出来。
接下来,让我们用一个异步的动作创建器来取代由createSlice函数创建的createNote动作创建器。
// ...
import noteService from '../services/notes'

const noteSlice = createSlice({
  name: 'notes',
  initialState,
  reducers: {
    toggleImportanceOf(state, action) {      const id = action.payload      const noteToChange = state.find(n => n.id === id)      const changedNote = {        ...noteToChange,        important: !noteToChange.important      }      return state.map(note =>        note.id !== id ? note : changedNote      )    },    appendNote(state, action) {      state.push(action.payload)    },    setNotes(state, action) {      return action.payload    }  },
})

export const { toggleImportanceOf, appendNote, setNotes } = noteSlice.actions
export const initializeNotes = () => {
  return async dispatch => {
    const notes = await noteService.getAll()
    dispatch(setNotes(notes))
  }
}

export const createNote = content => {  return async dispatch => {    const newNote = await noteService.createNew(content)    dispatch(appendNote(newNote))  }}
export default noteSlice.reducer这里的原理是一样的:首先,执行一个异步操作,之后,改变存储状态的动作被dispatched。Redux工具包提供了大量的工具来简化异步状态管理。适合这个用例的工具有:createAsyncThunk函数和RTK Query API。
组件NewNote的变化如下。
const NewNote = () => {
  const dispatch = useDispatch()

  const addNote = async (event) => {
    event.preventDefault()
    const content = event.target.note.value
    event.target.note.value = ''
    dispatch(createNote(content))  }

  return (
    <form onSubmit={addNote}>
      <input name="note" />
      <button type="submit">lisää</button>
    </form>
  )
}最后,让我们清理一下index.js文件,把与创建Redux商店有关的代码移到自己的store.js文件中。
import { configureStore } from '@reduxjs/toolkit'

import noteReducer from './reducers/noteReducer'
import filterReducer from './reducers/filterReducer'

const store = configureStore({
  reducer: {
    notes: noteReducer,
    filter: filterReducer
  }
})

export default store更改后,index.js的内容如下。
import React from 'react'
import ReactDOM from 'react-dom/client'
import { Provider } from 'react-redux'
import store from './store'import App from './App'

ReactDOM.createRoot(document.getElementById('root')).render(
  <Provider store={store}>
    <App />
  </Provider>,
  document.getElementById('root')
)应用的代码的当前状态可以在GitHub的分支part6-4中找到。